DIY Pendant Necklace

necklaceI’m not the “craftiest” of people, unfortunately. I hate messes therefore, I don’t like most crafts. Glitter makes me shudder. But a couple months back over Thanksgiving break, I really wanted to do something fun (and not messy) with my kids. I had seen polymer clay jewelry on Pinterest for awhile and since I love jewelry (and so do my little girlies), I decided to give it a try.

We headed over to Michaels armed with my good ol’ 40% off coupon. And I stocked up on clay! Since this was my first time using polymer clay, I bought a variety pack with a bunch of different colors and spent about $15 total on the jewelry making supplies. And I have a bunch leftover and we’ve since made quite a bit of pieces.

Am I now an expert jewelry maker? God, no! But, I’ve made some pieces since our first initial try that have turned out pretty good. My kids love their jewelry and not only did they get to be “crafty”, but they can actually wear/use what they made. All my kids are in elementary school and were completely capable of doing this. We started out simple that day and just rolled out balls and made necklaces. But what I really wanted was a stone looking pendant necklace. I’d been eyeing one on a website that I really wanted but with my new stock of clay, I figured it was worth a try. And here’s how I made it.

necklace 2Supplies Needed:

  • Polymer clay, in any color/colors you choose
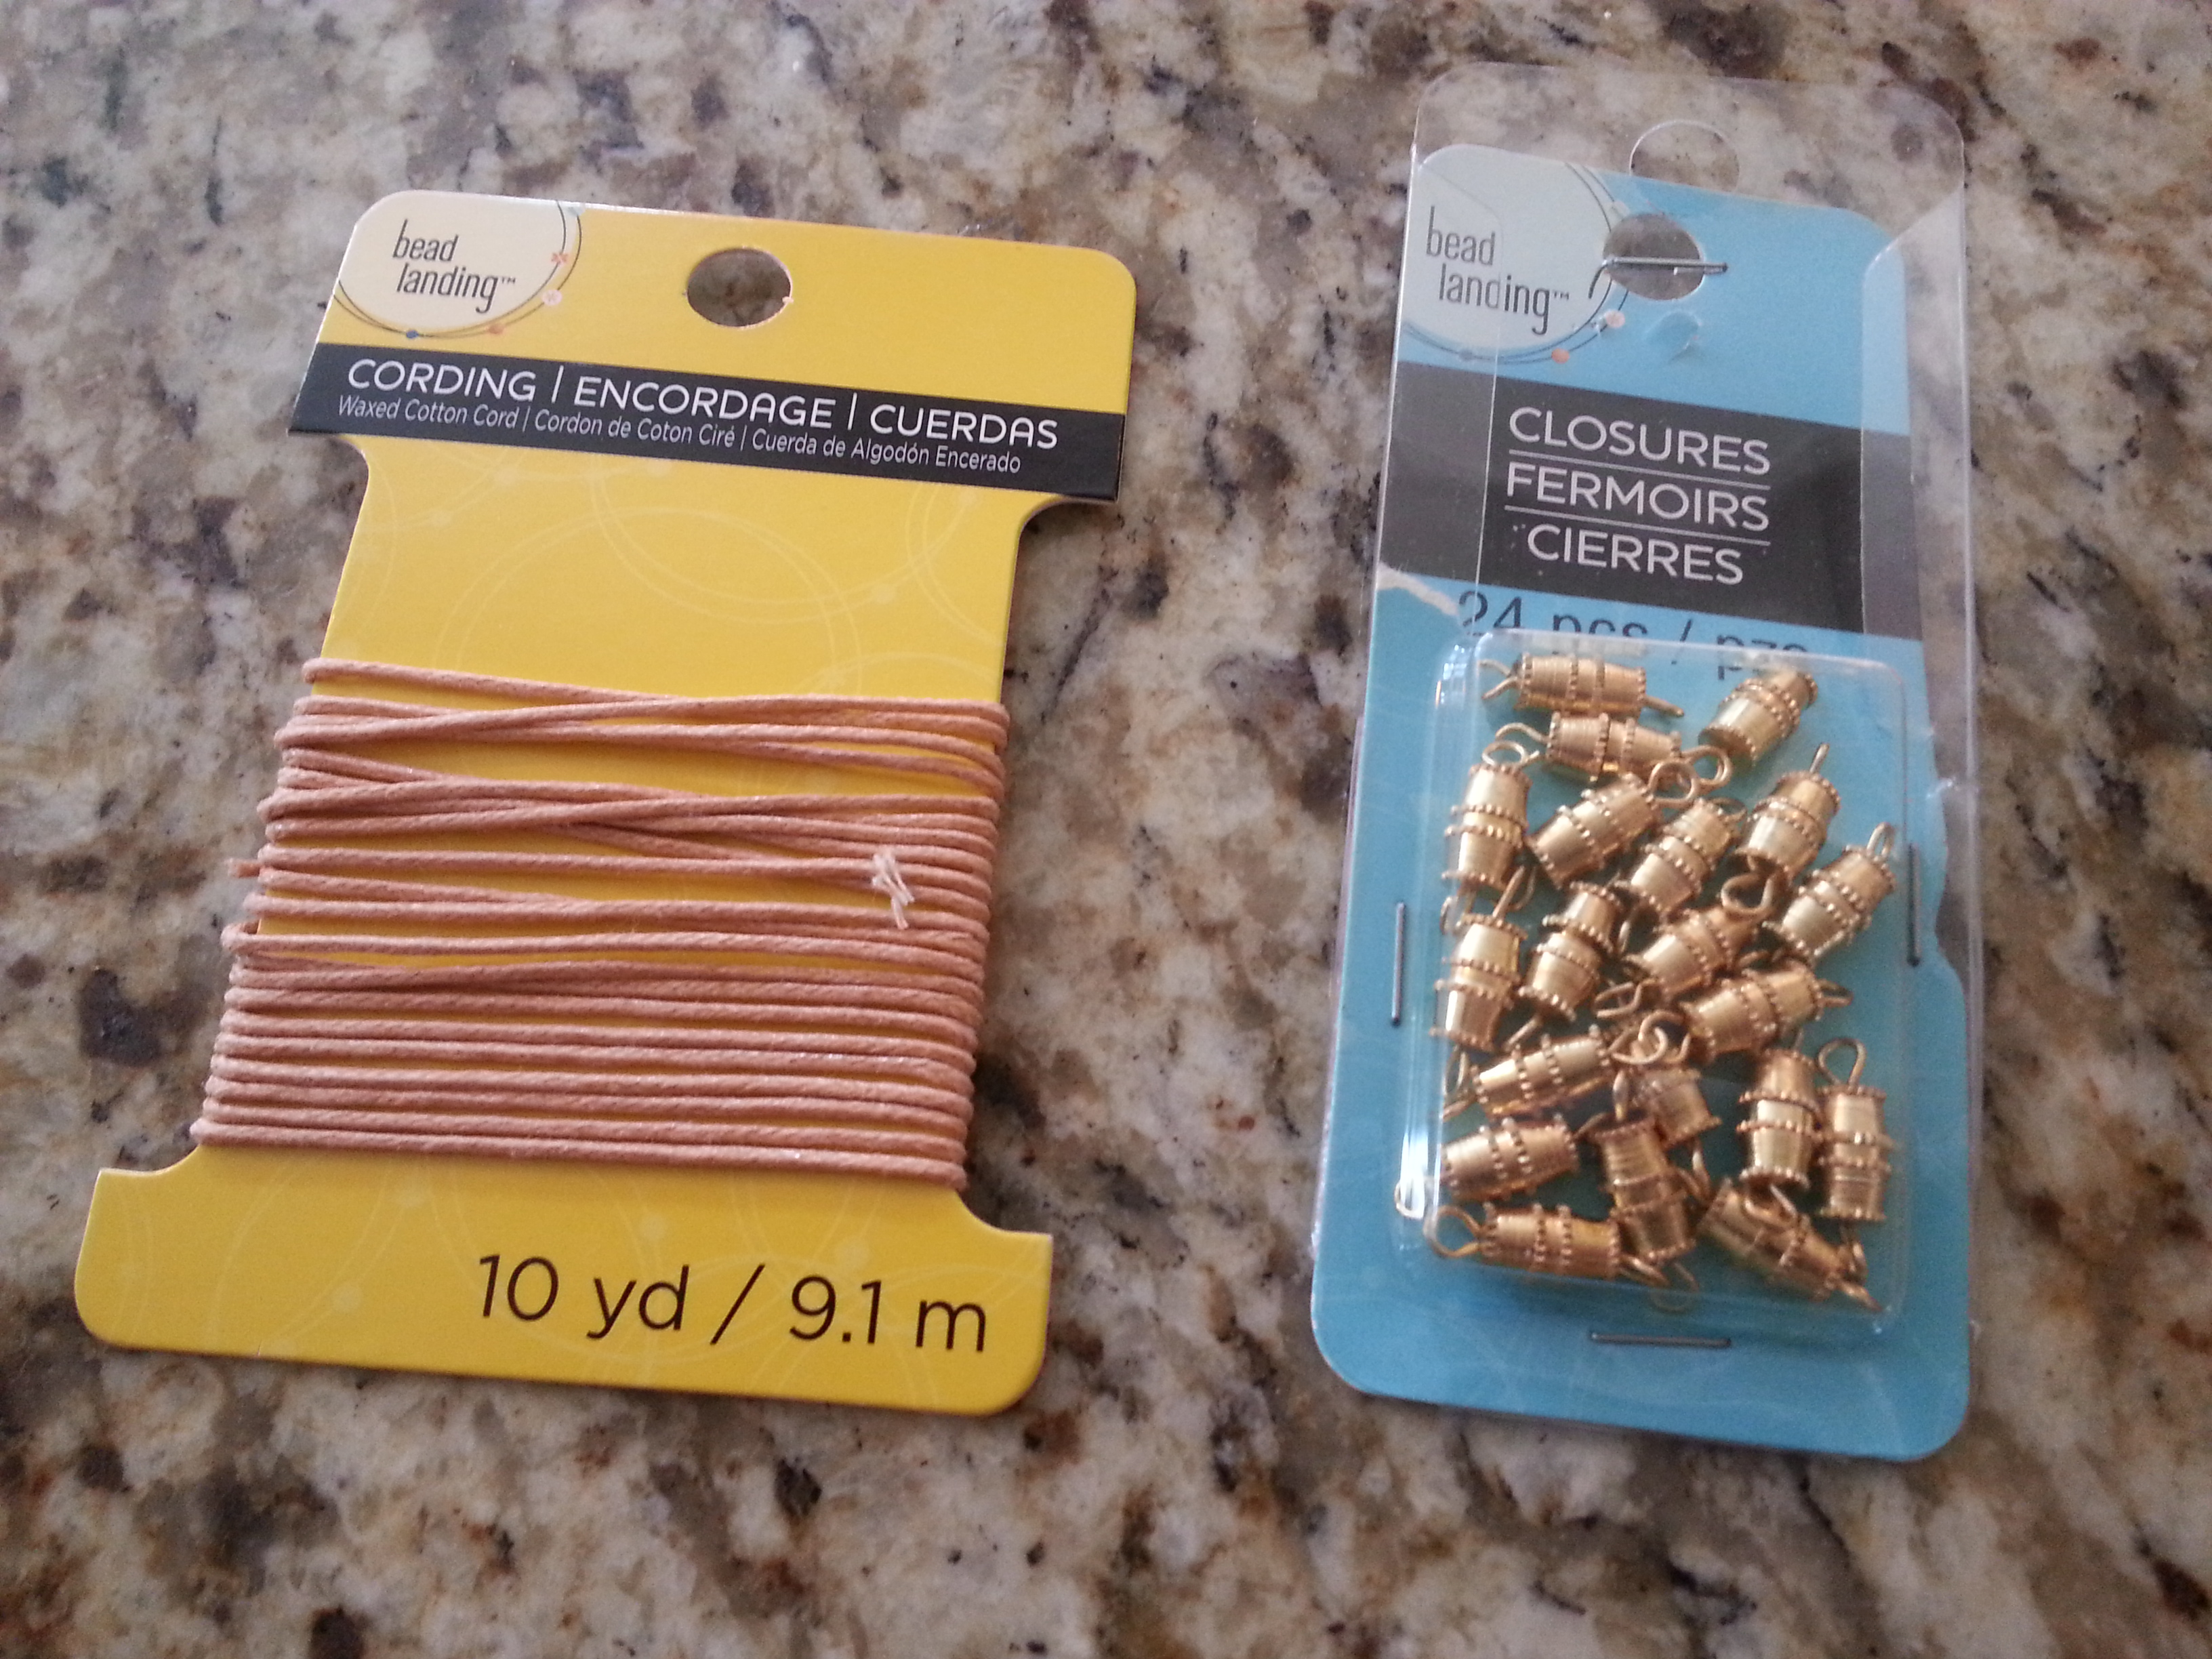
  • Waxed cotton cording
  • Necklace clasp (if you plan on having a shorter length necklace)
  • A toothpick
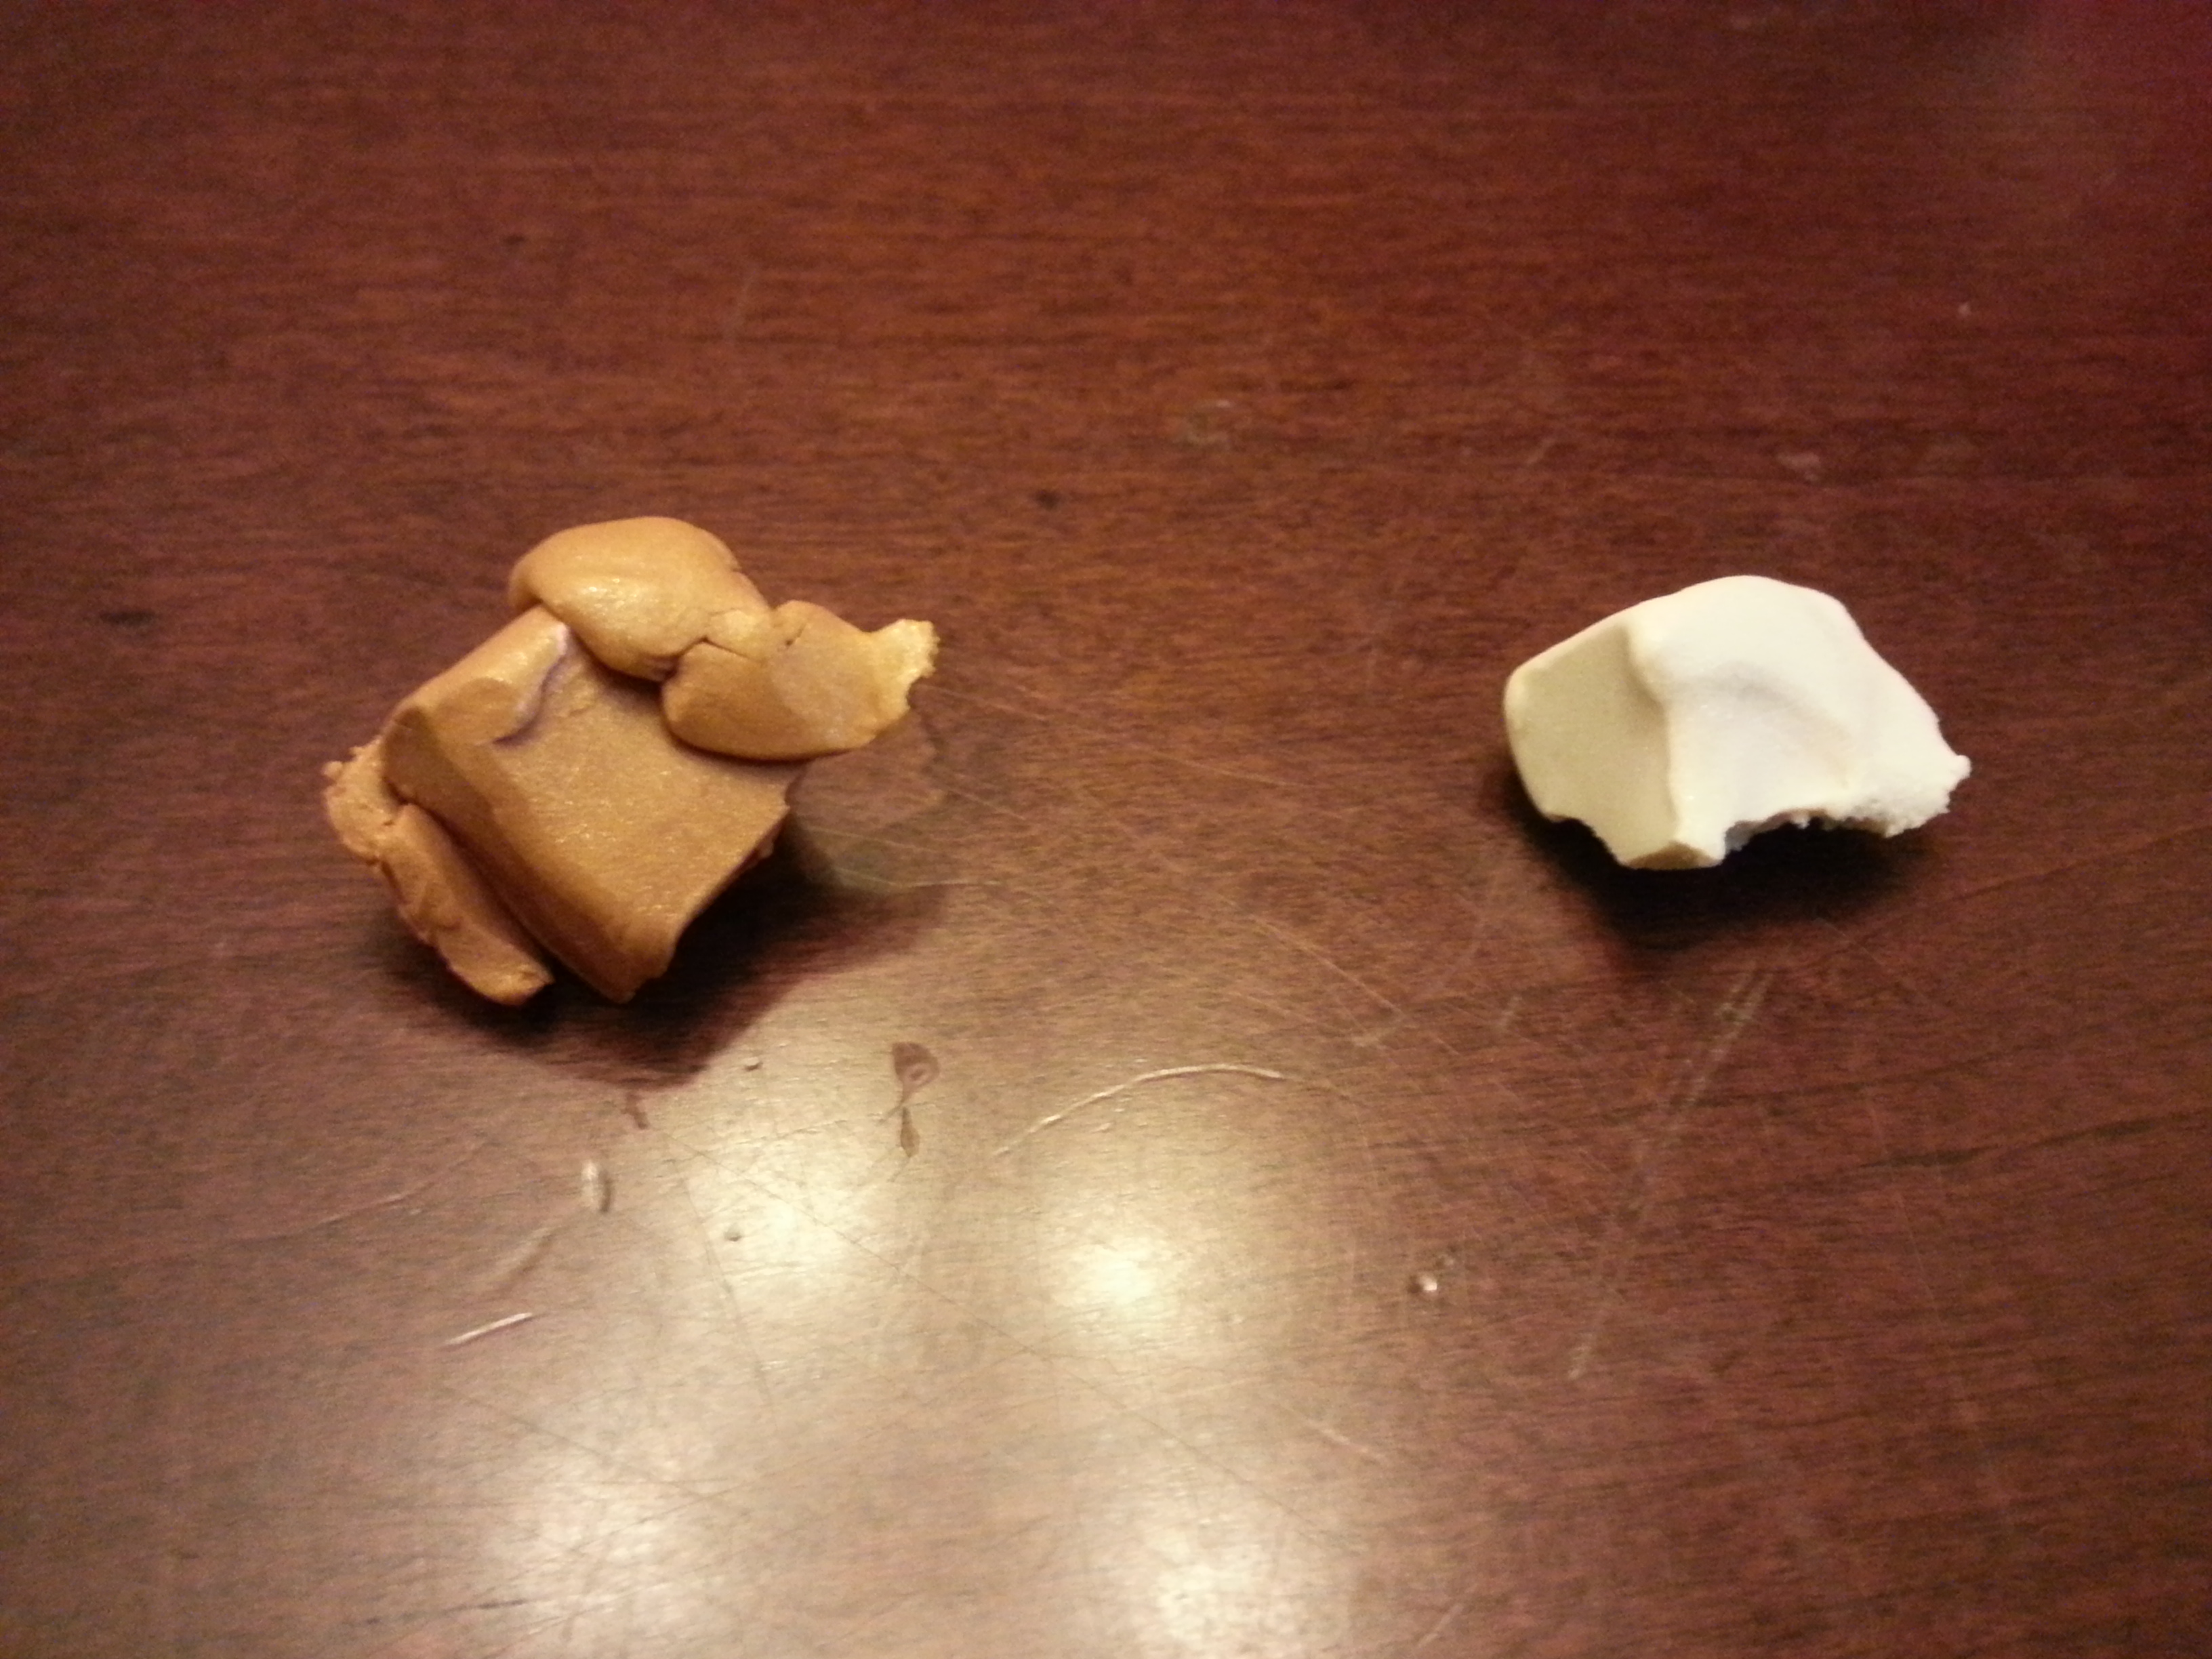
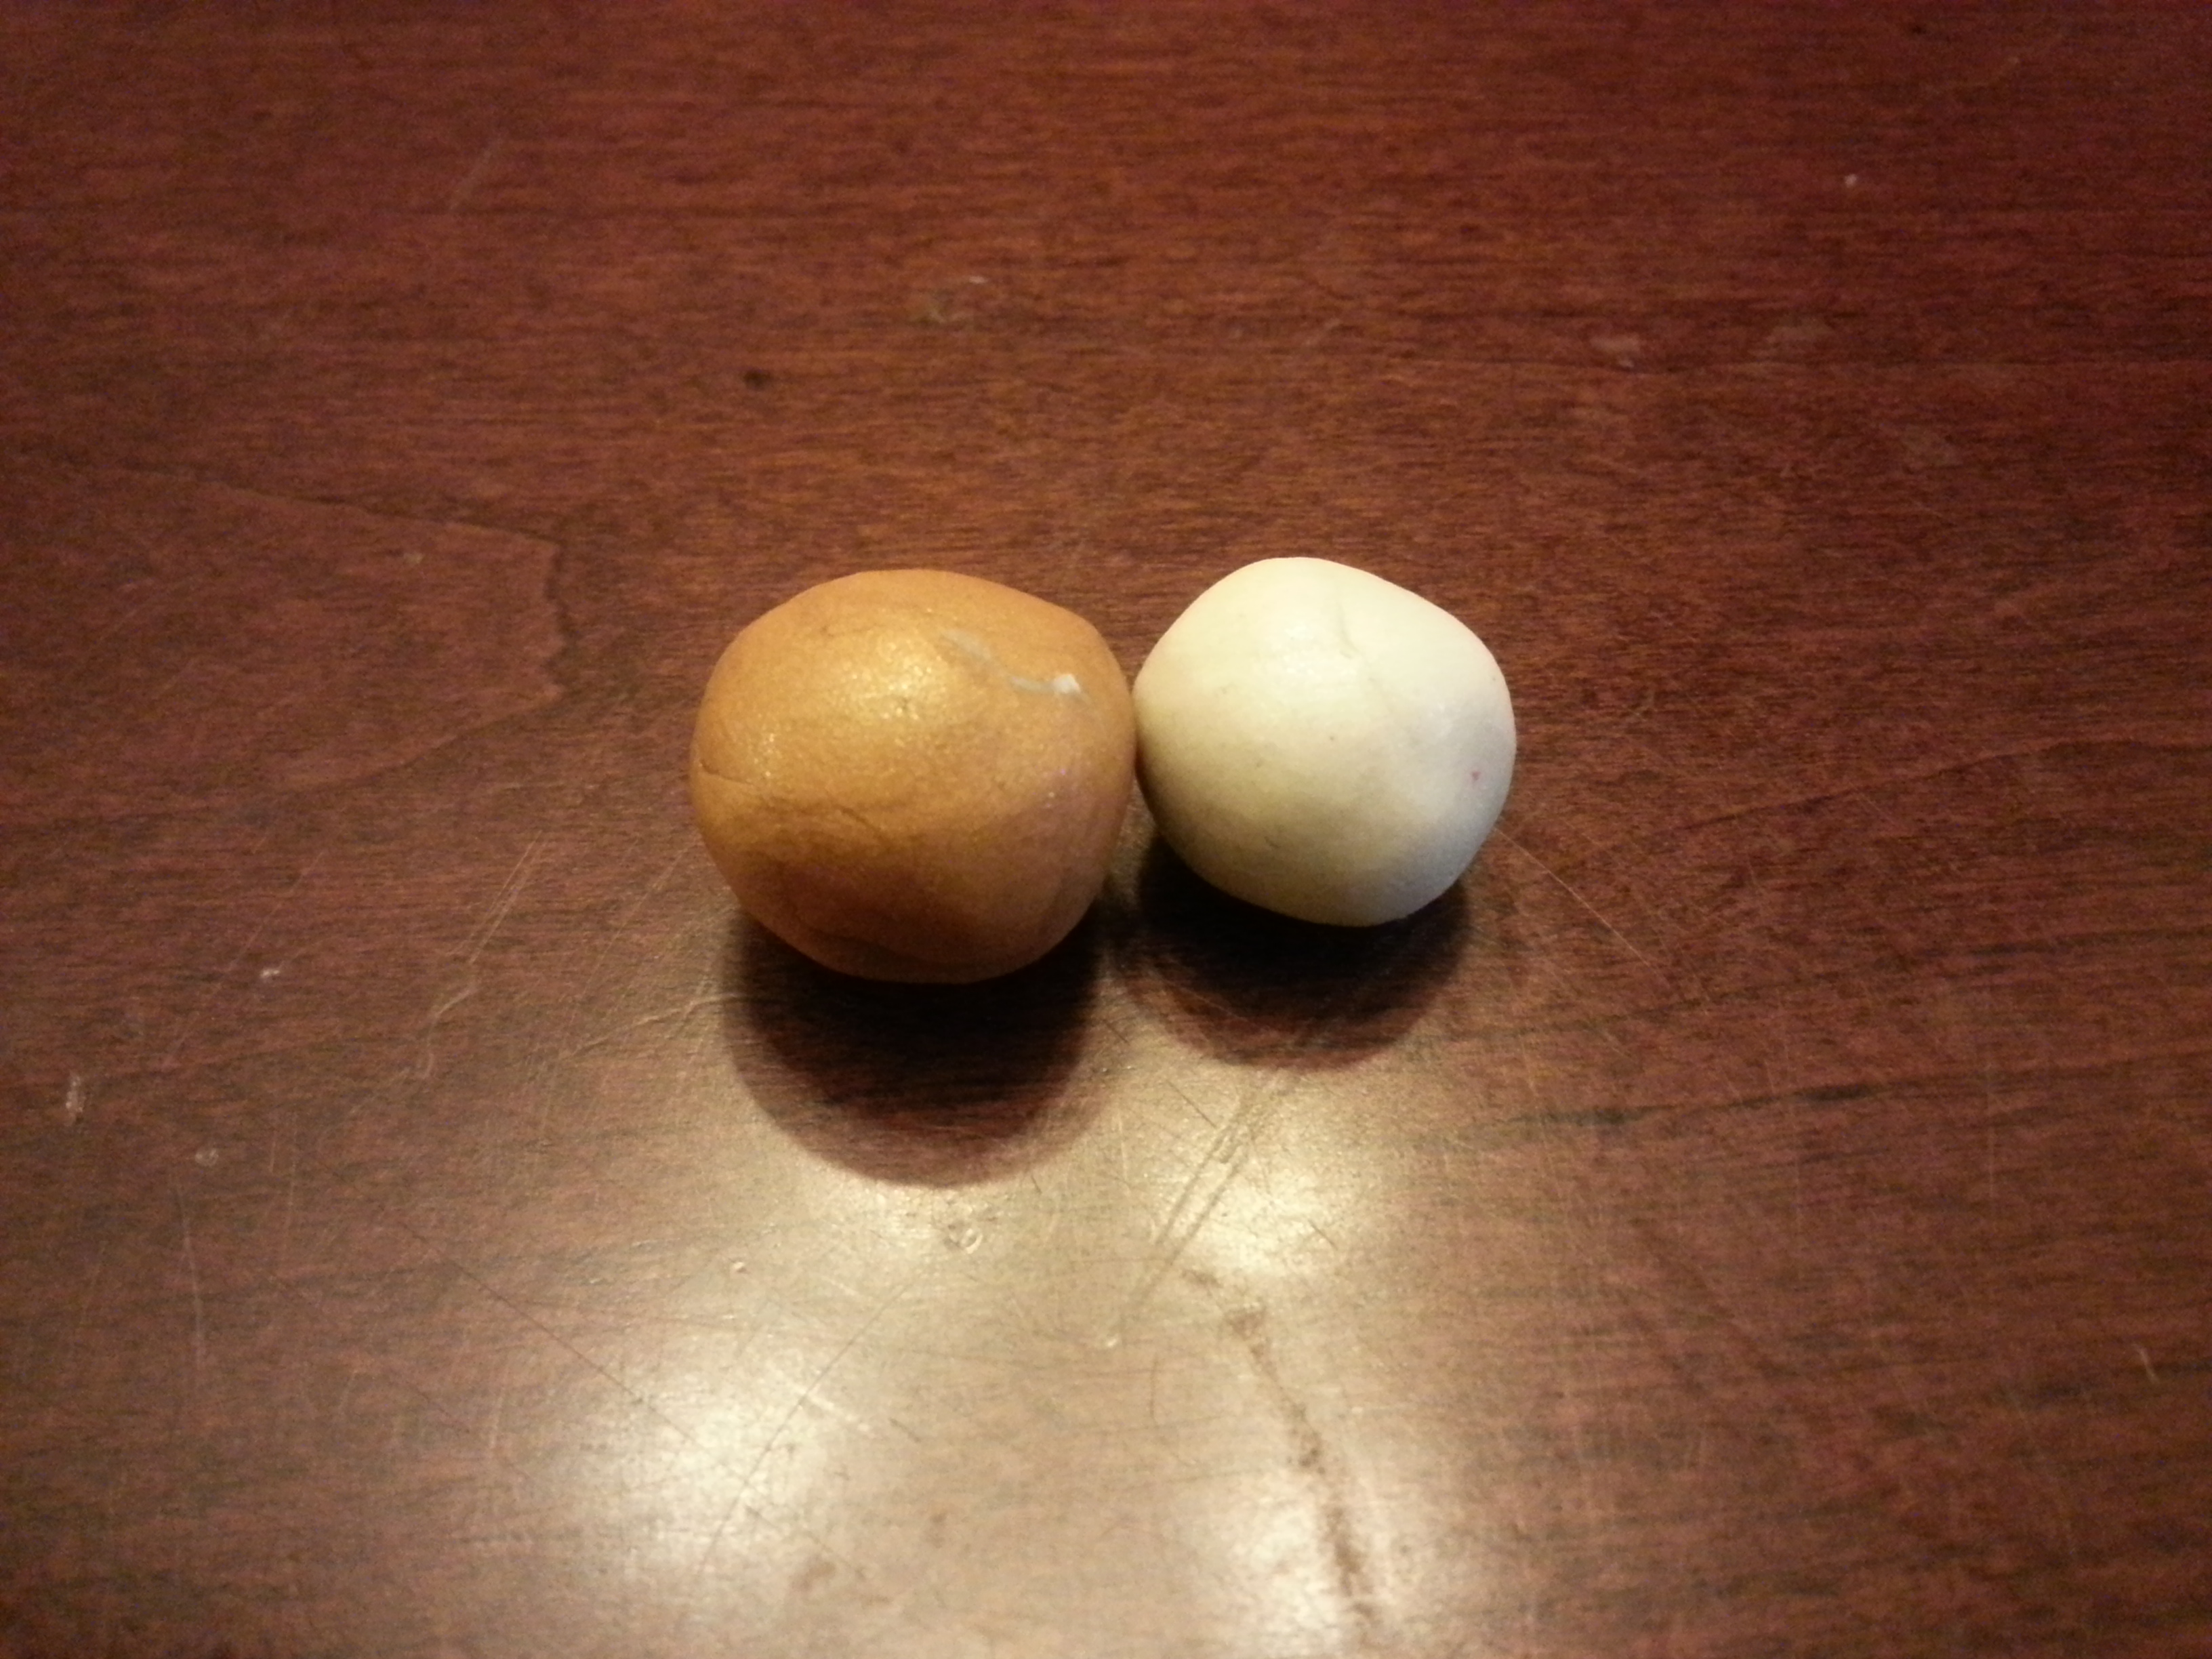
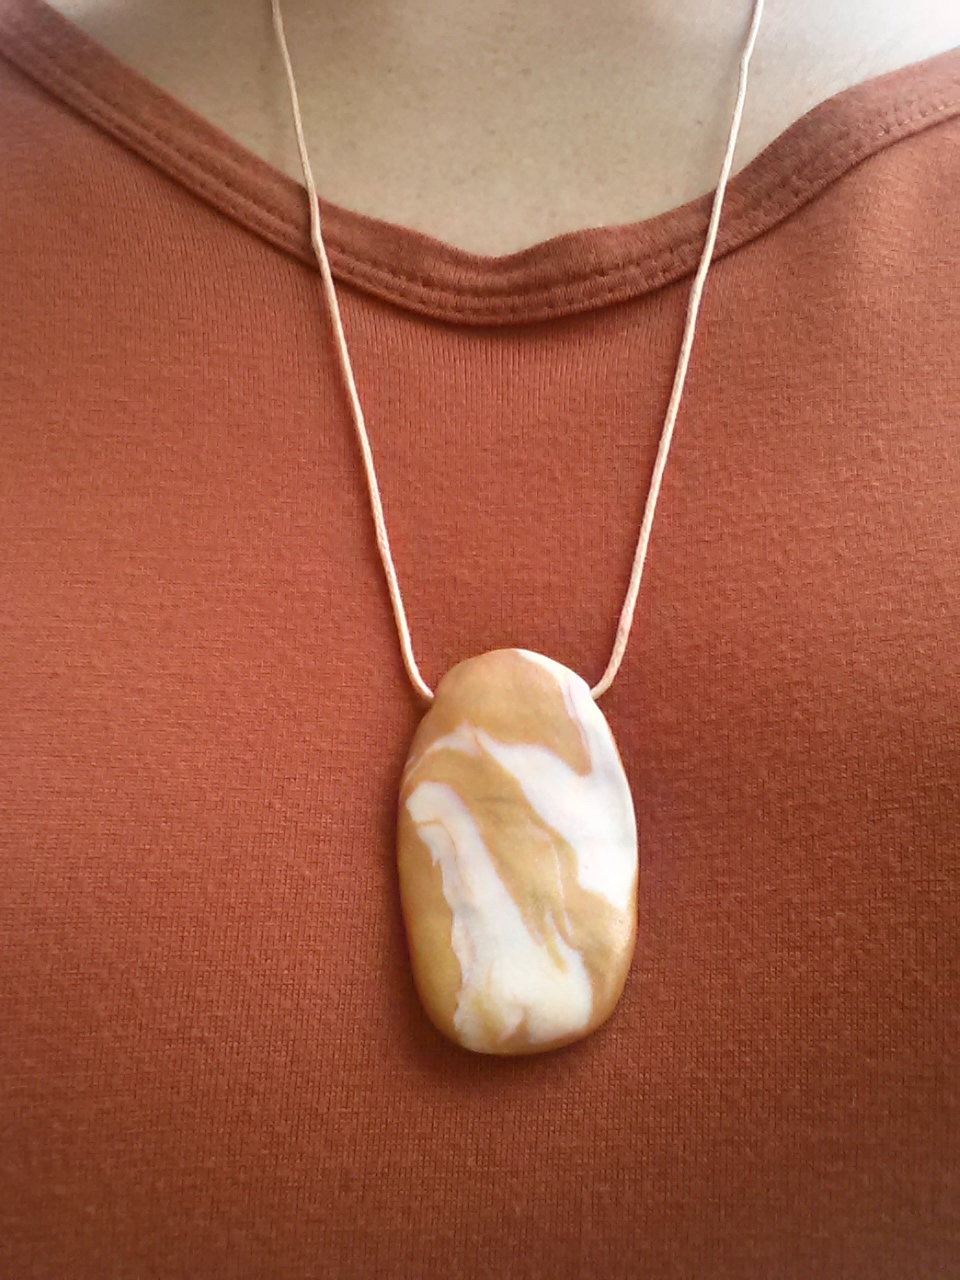
  1. Choose your color or colors. For the above necklace, I chose a bronze and silvery color clay.
  2. Grab a piece of each color. I did less of the silvery color because I wanted it to be streaky looking like a natural stone. Hold in your hands to condition (warm up to make more pliable) the clay.
  3. Roll into balls.
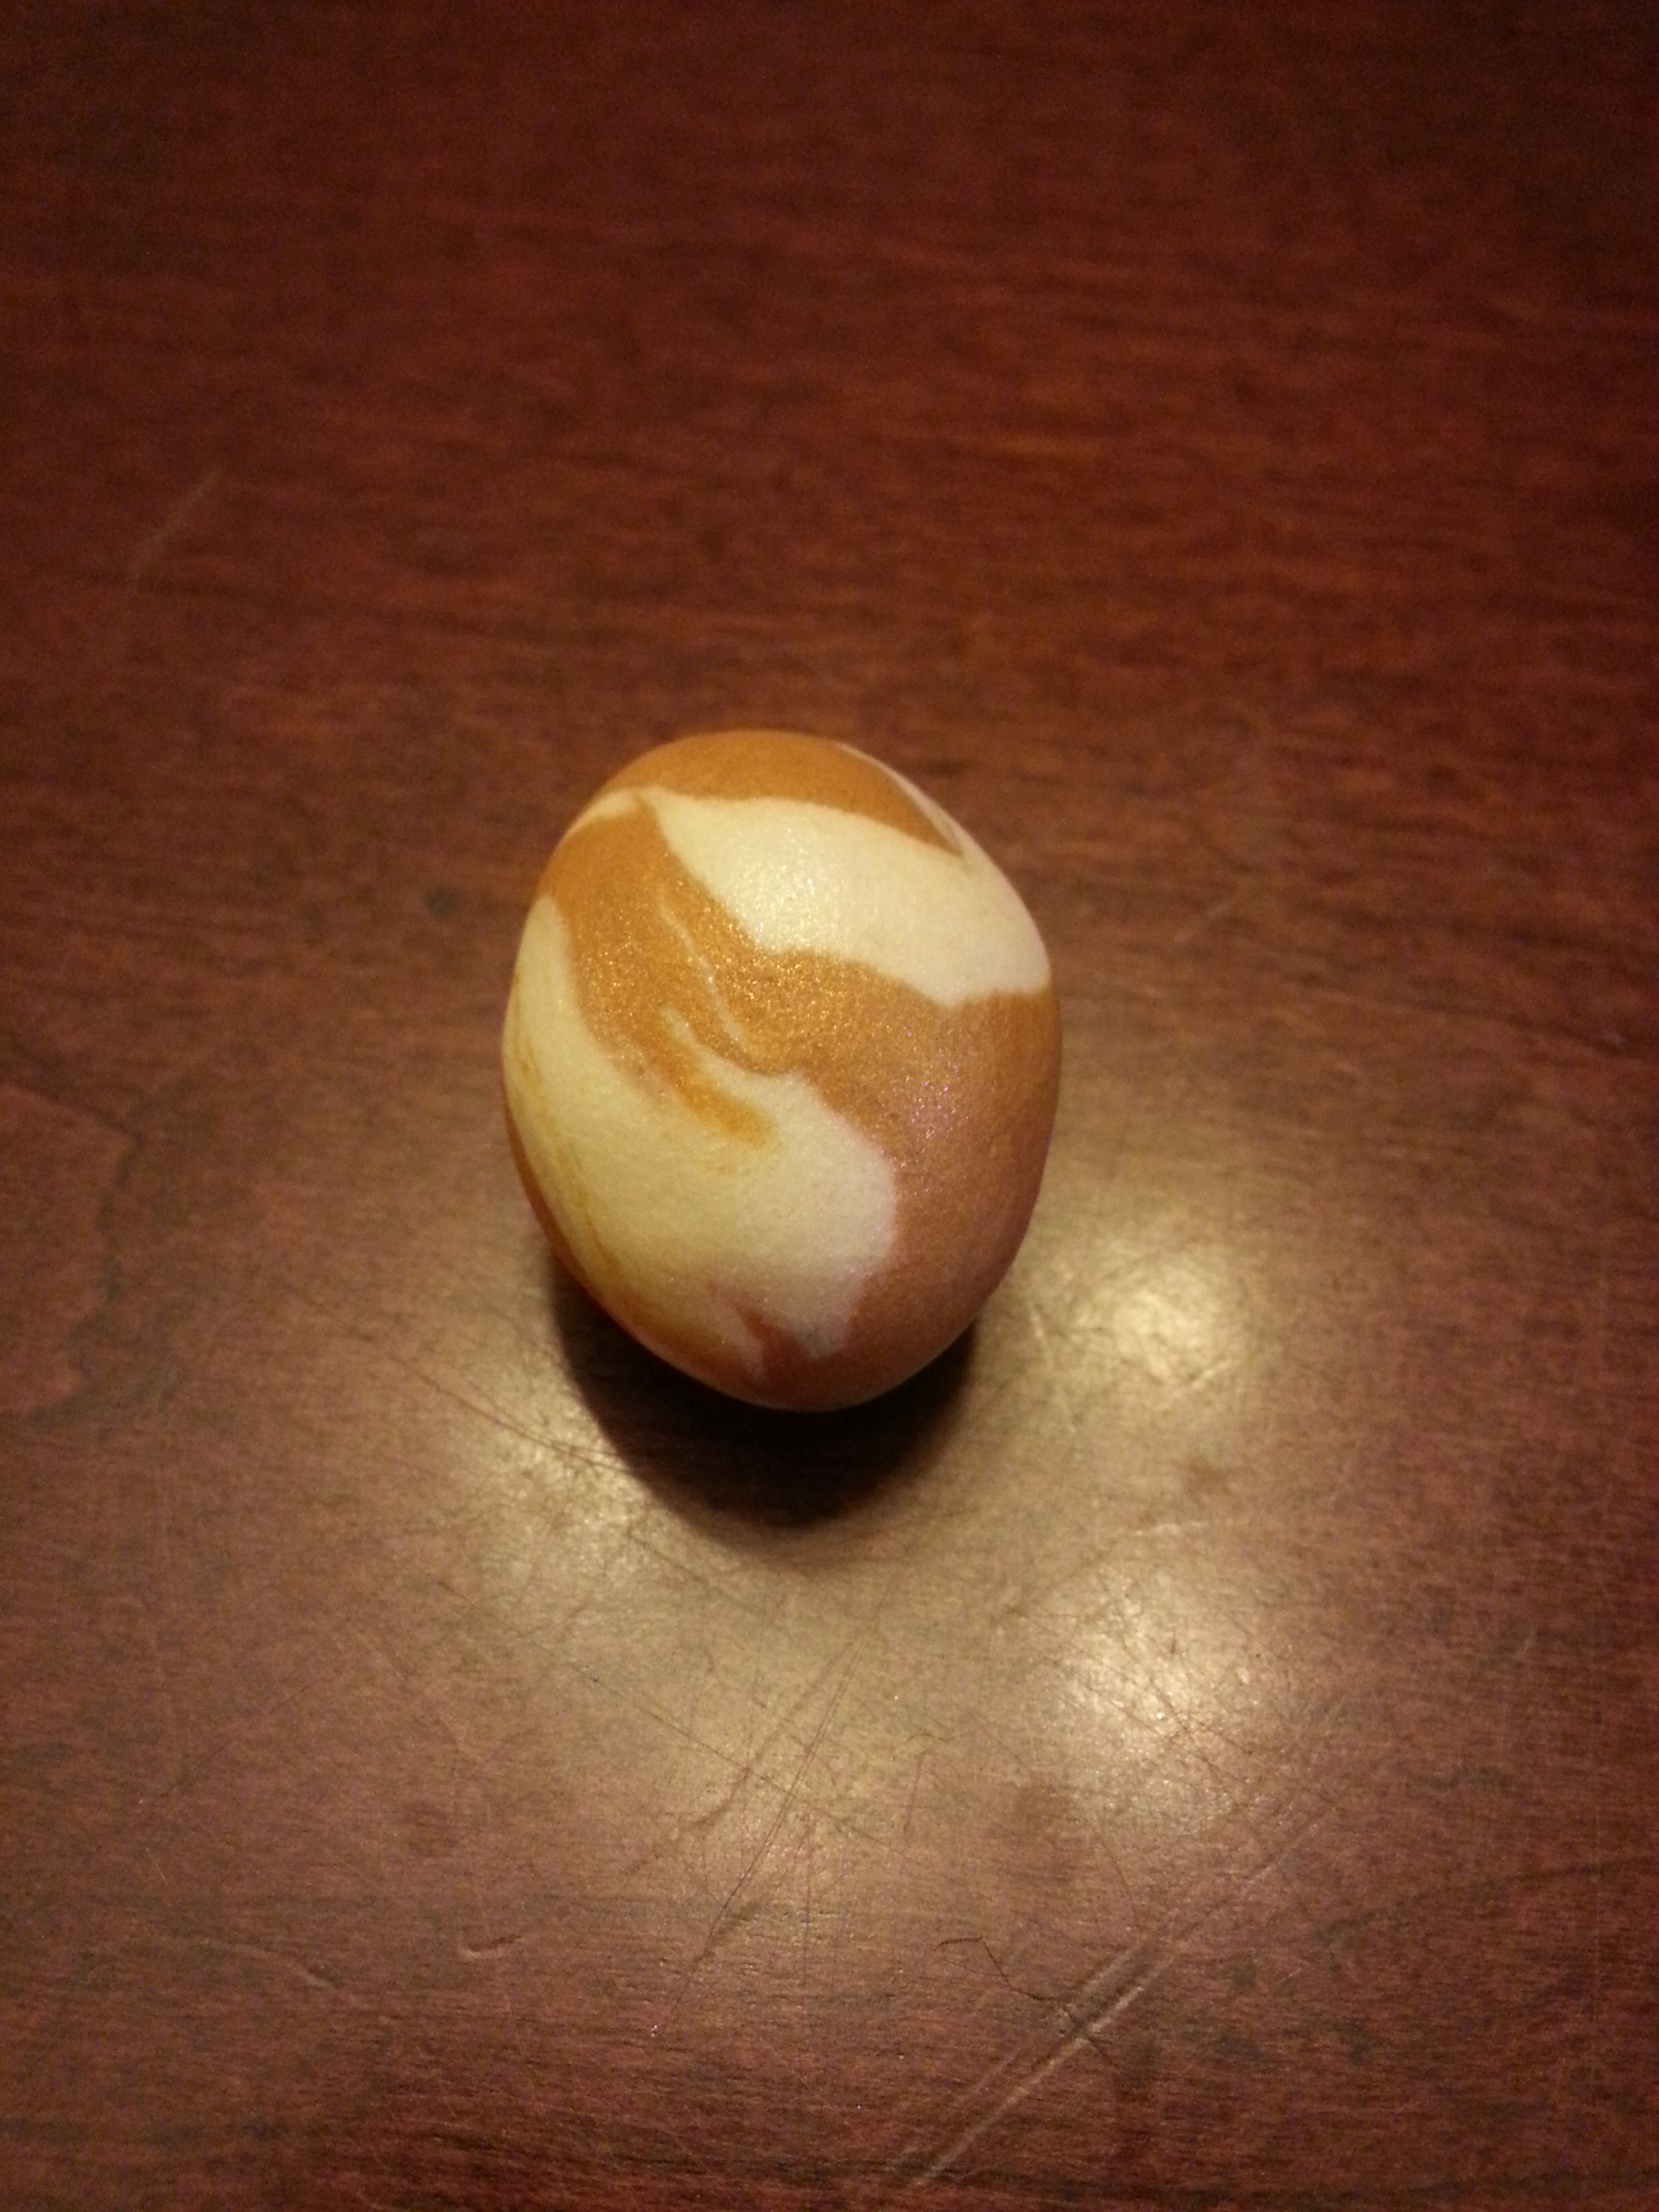
  4. Smoosh the balls together, working them into one ball.
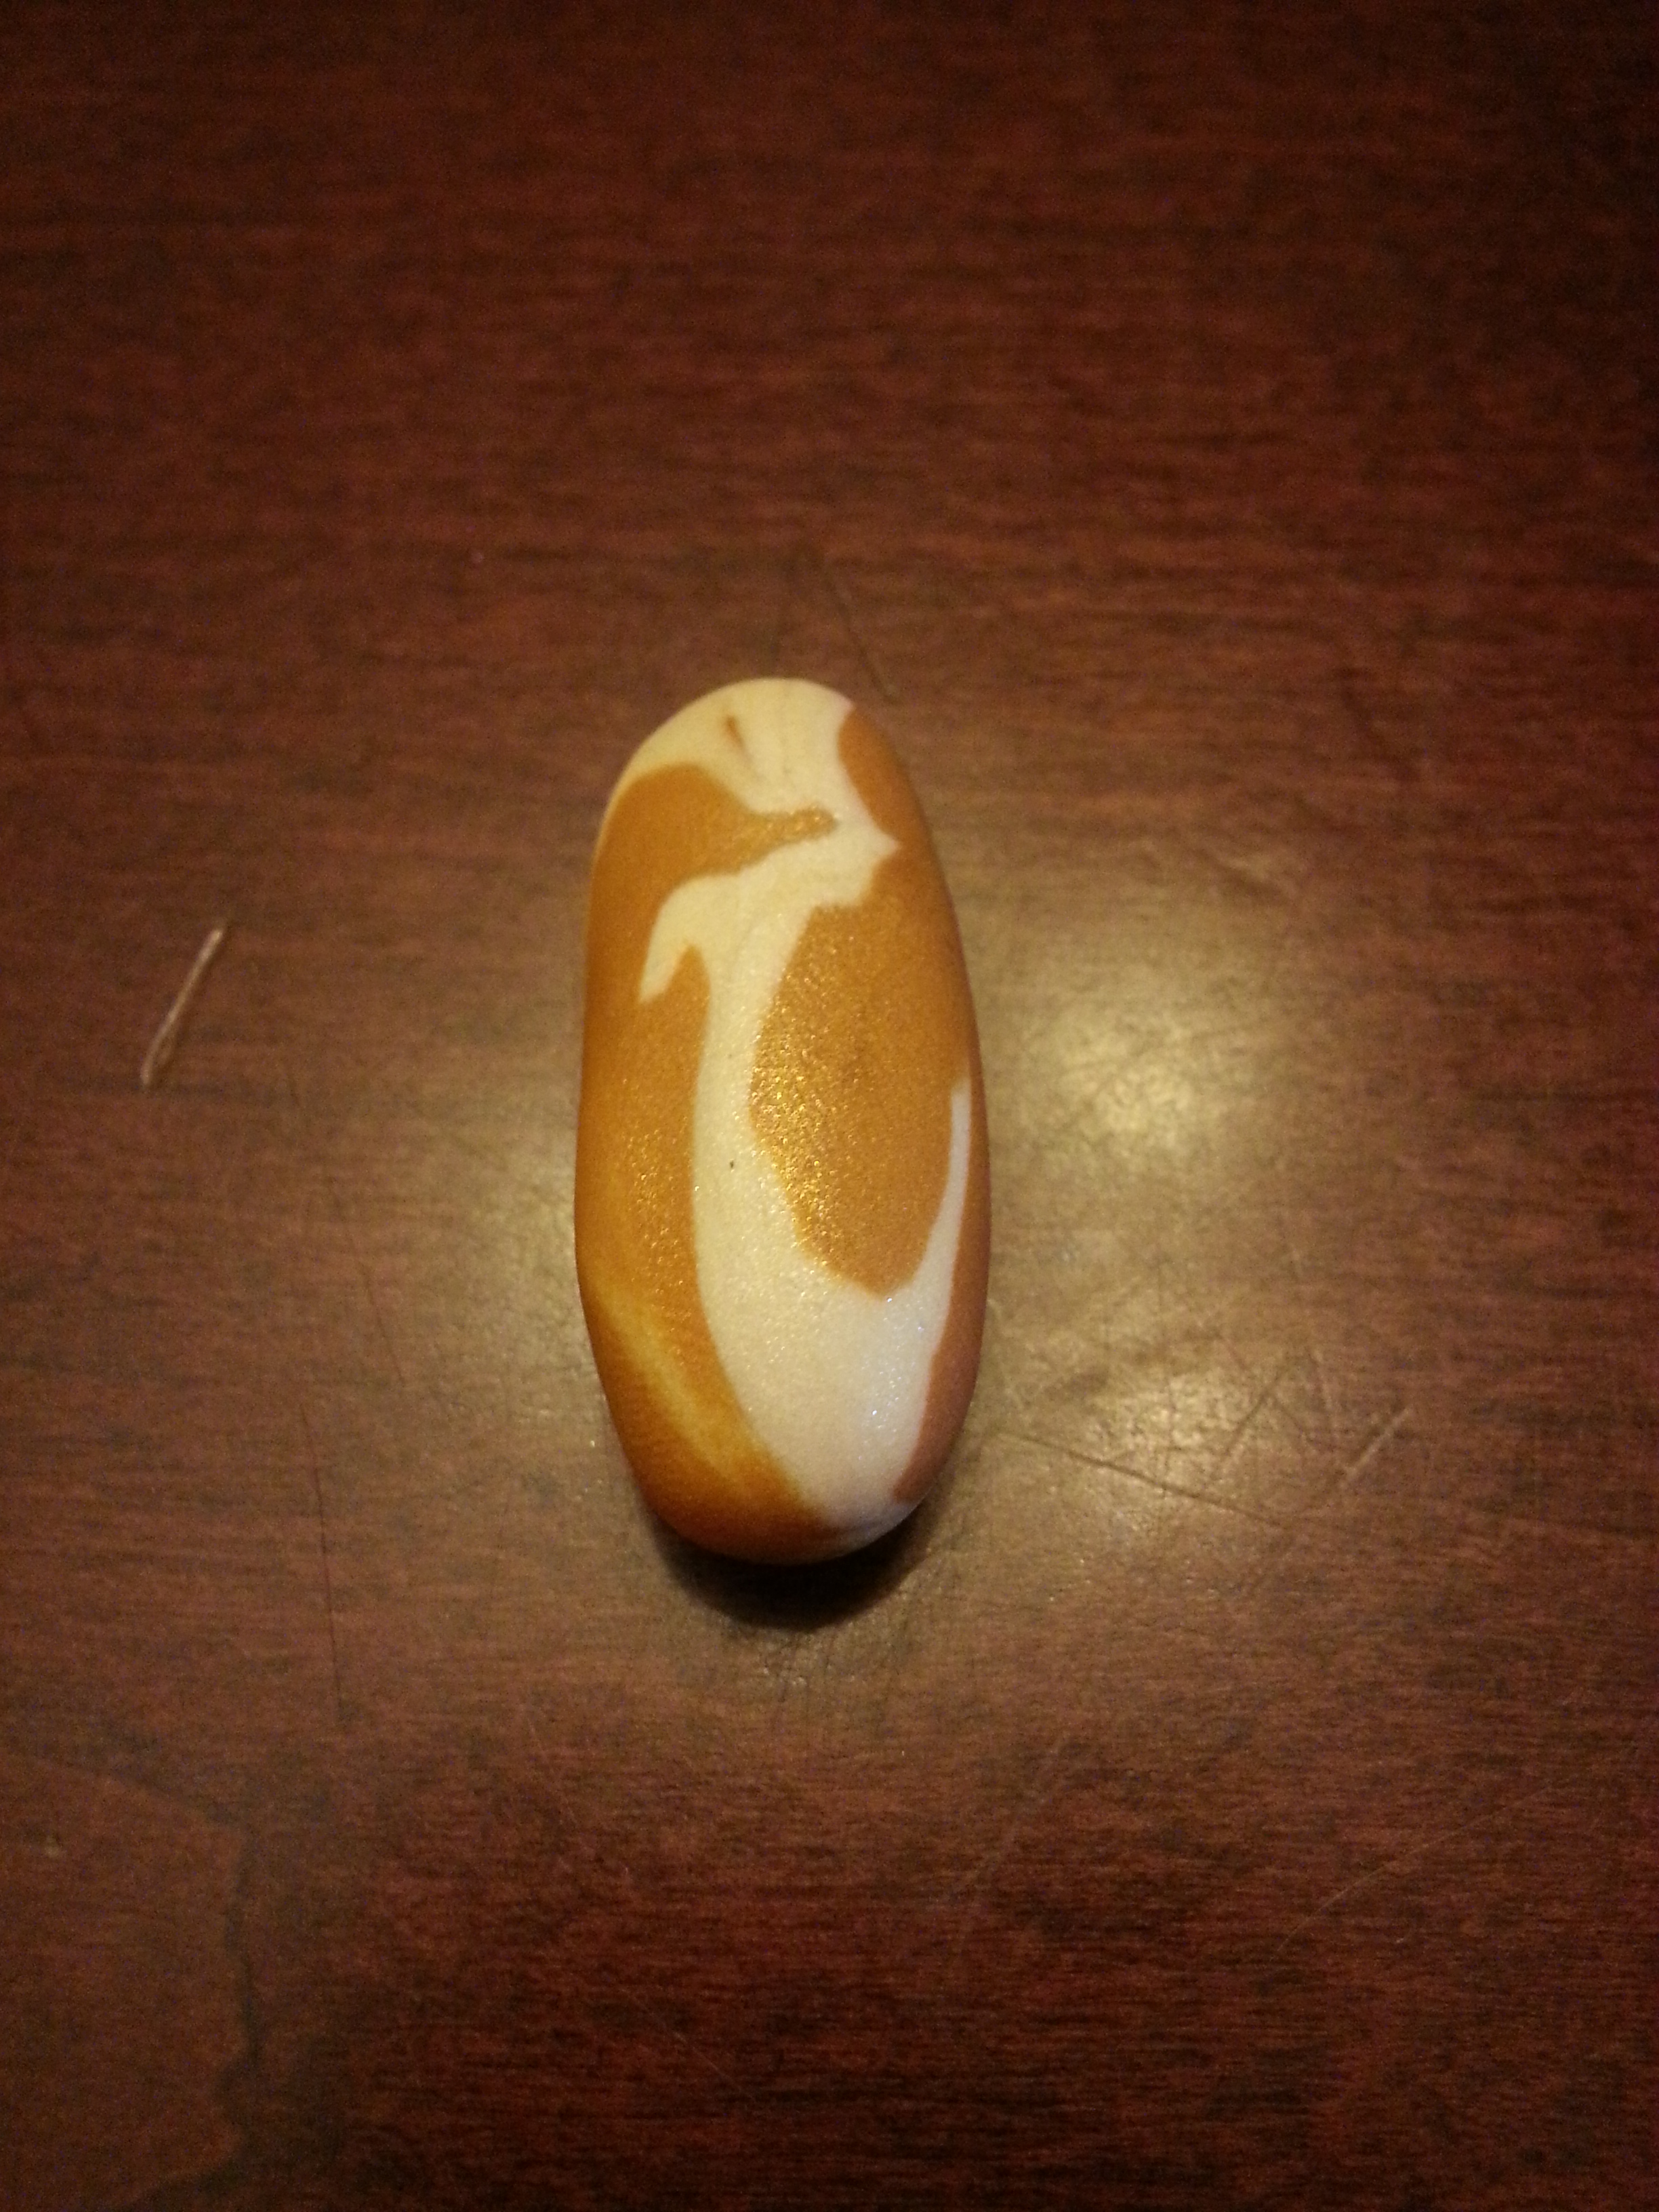
  5. In between your hands, roll the ball back and forth until it turns into a longer, ovalish shape.
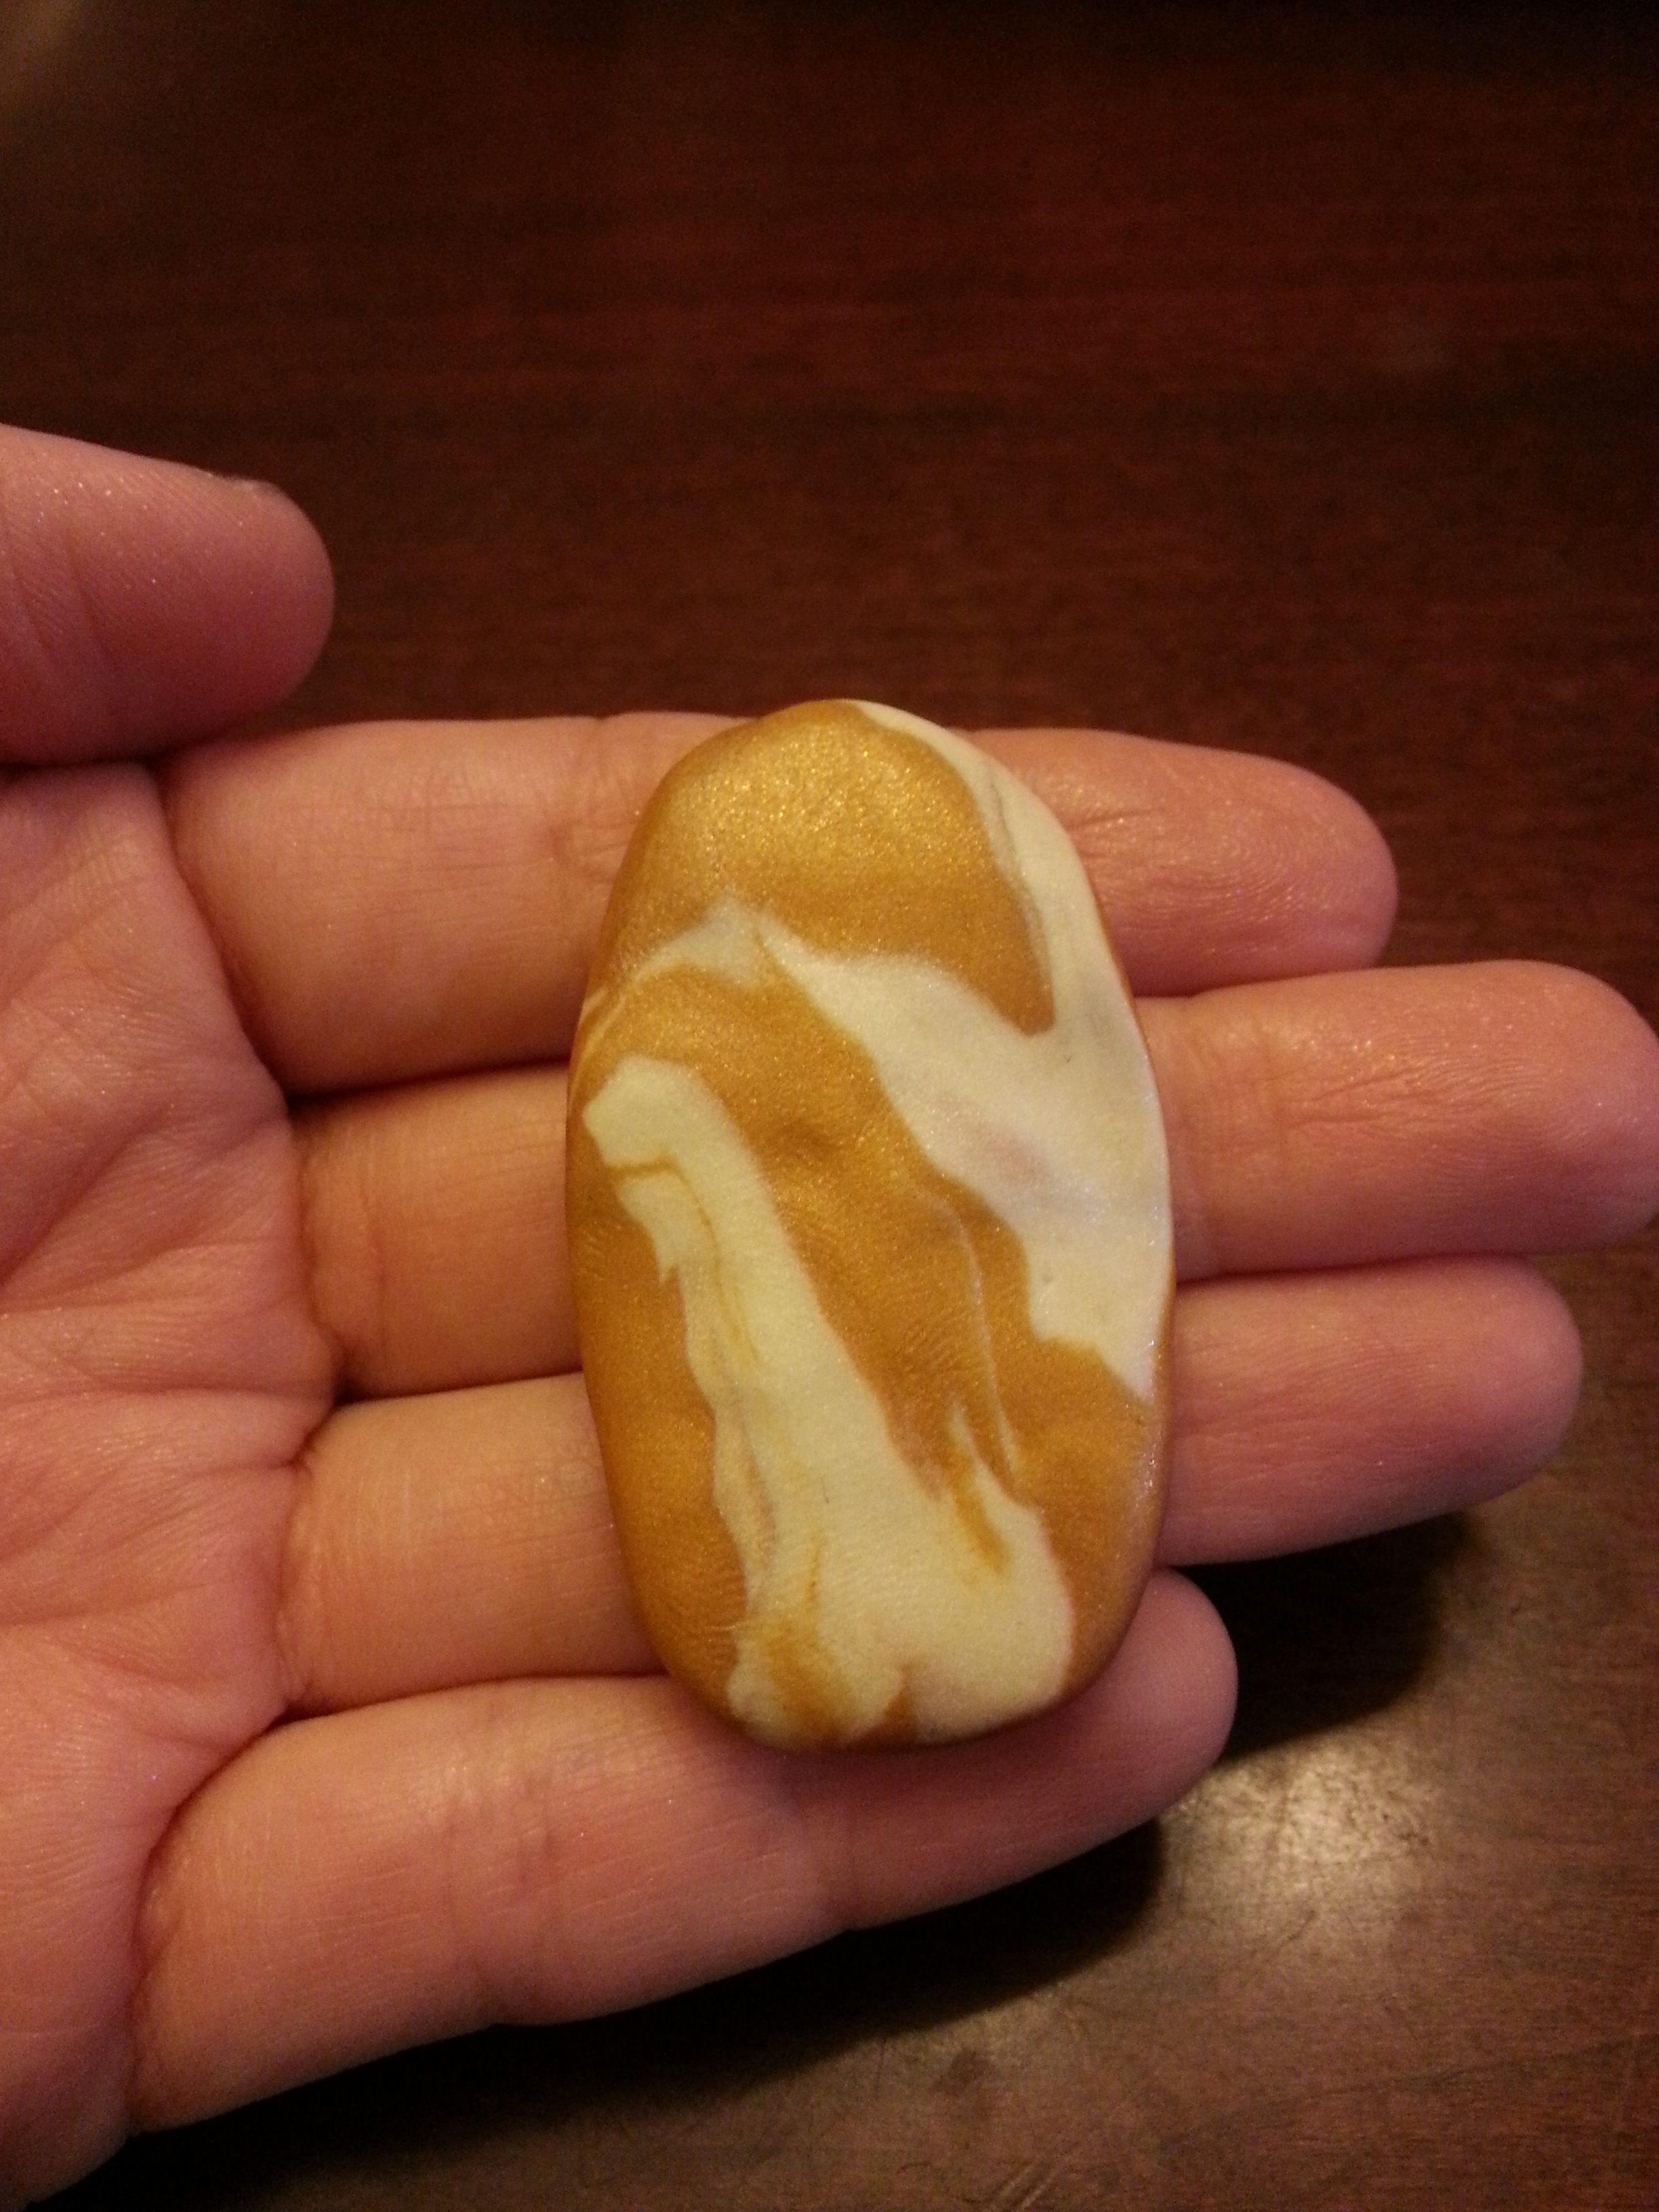
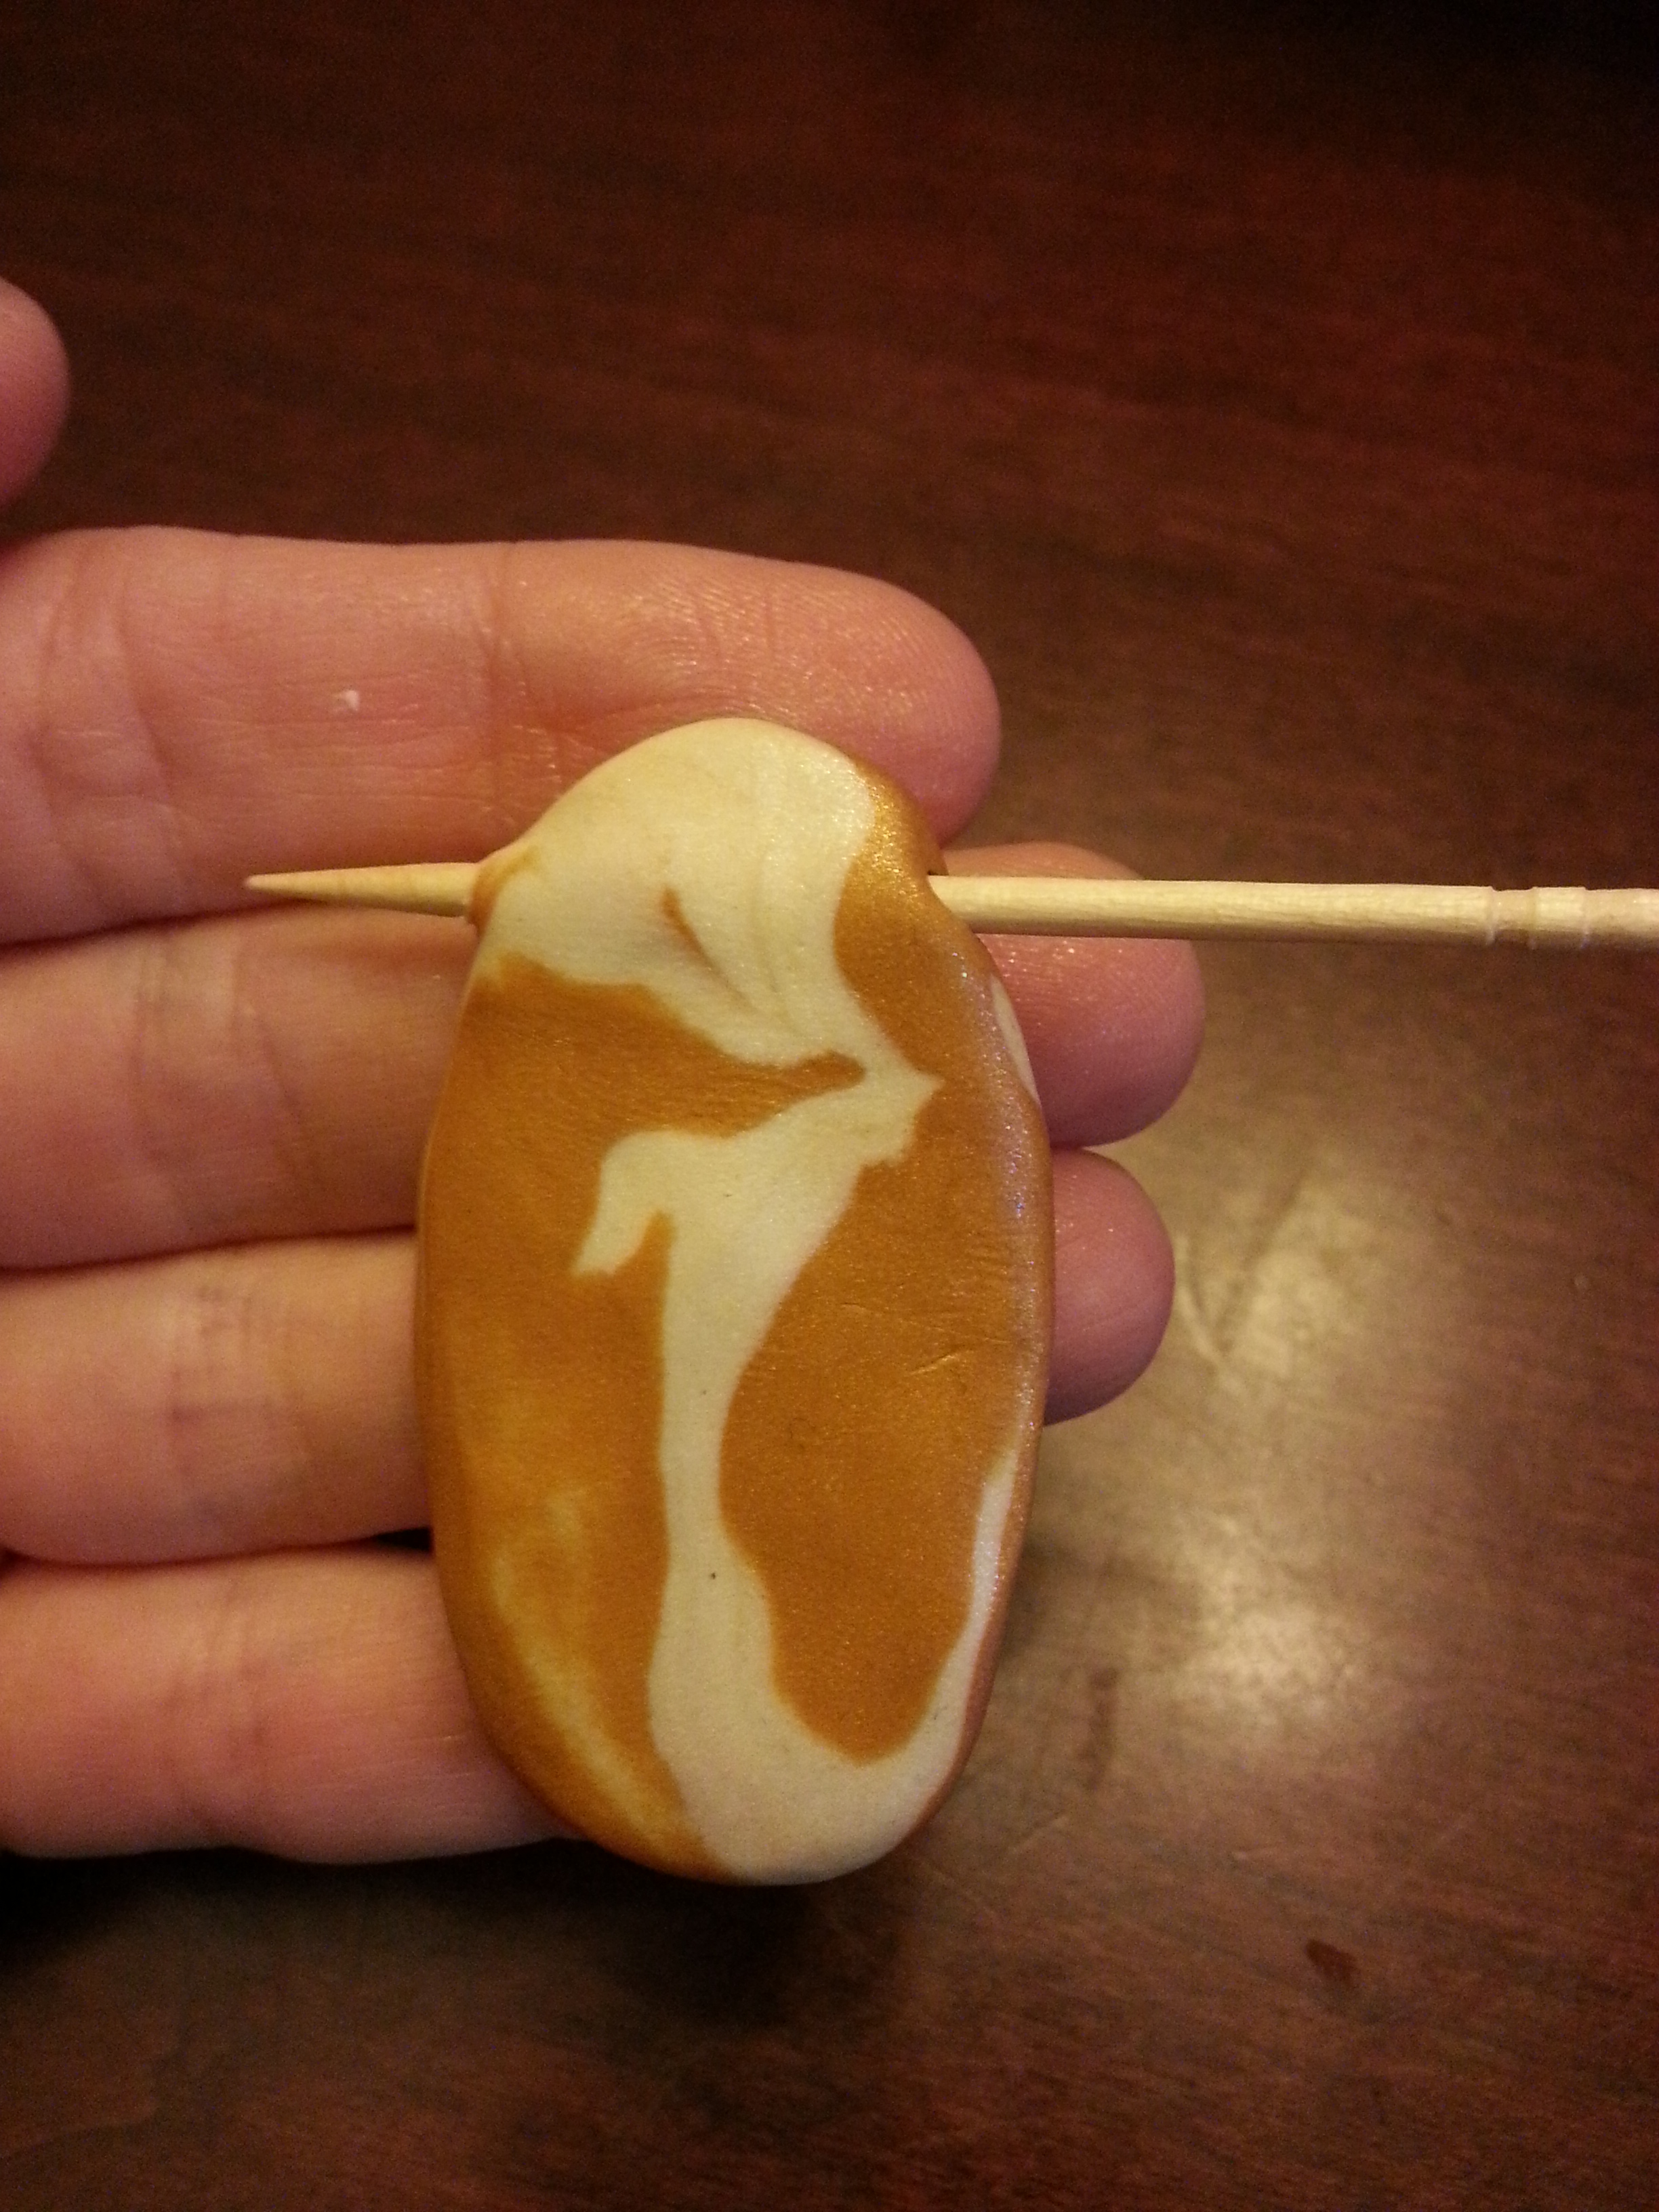
  6. Press between your hands into a pendant like shape, smoothing out any fingerprints.
  7. With the toothpick, push it through the top to create a hole to put the cording through.
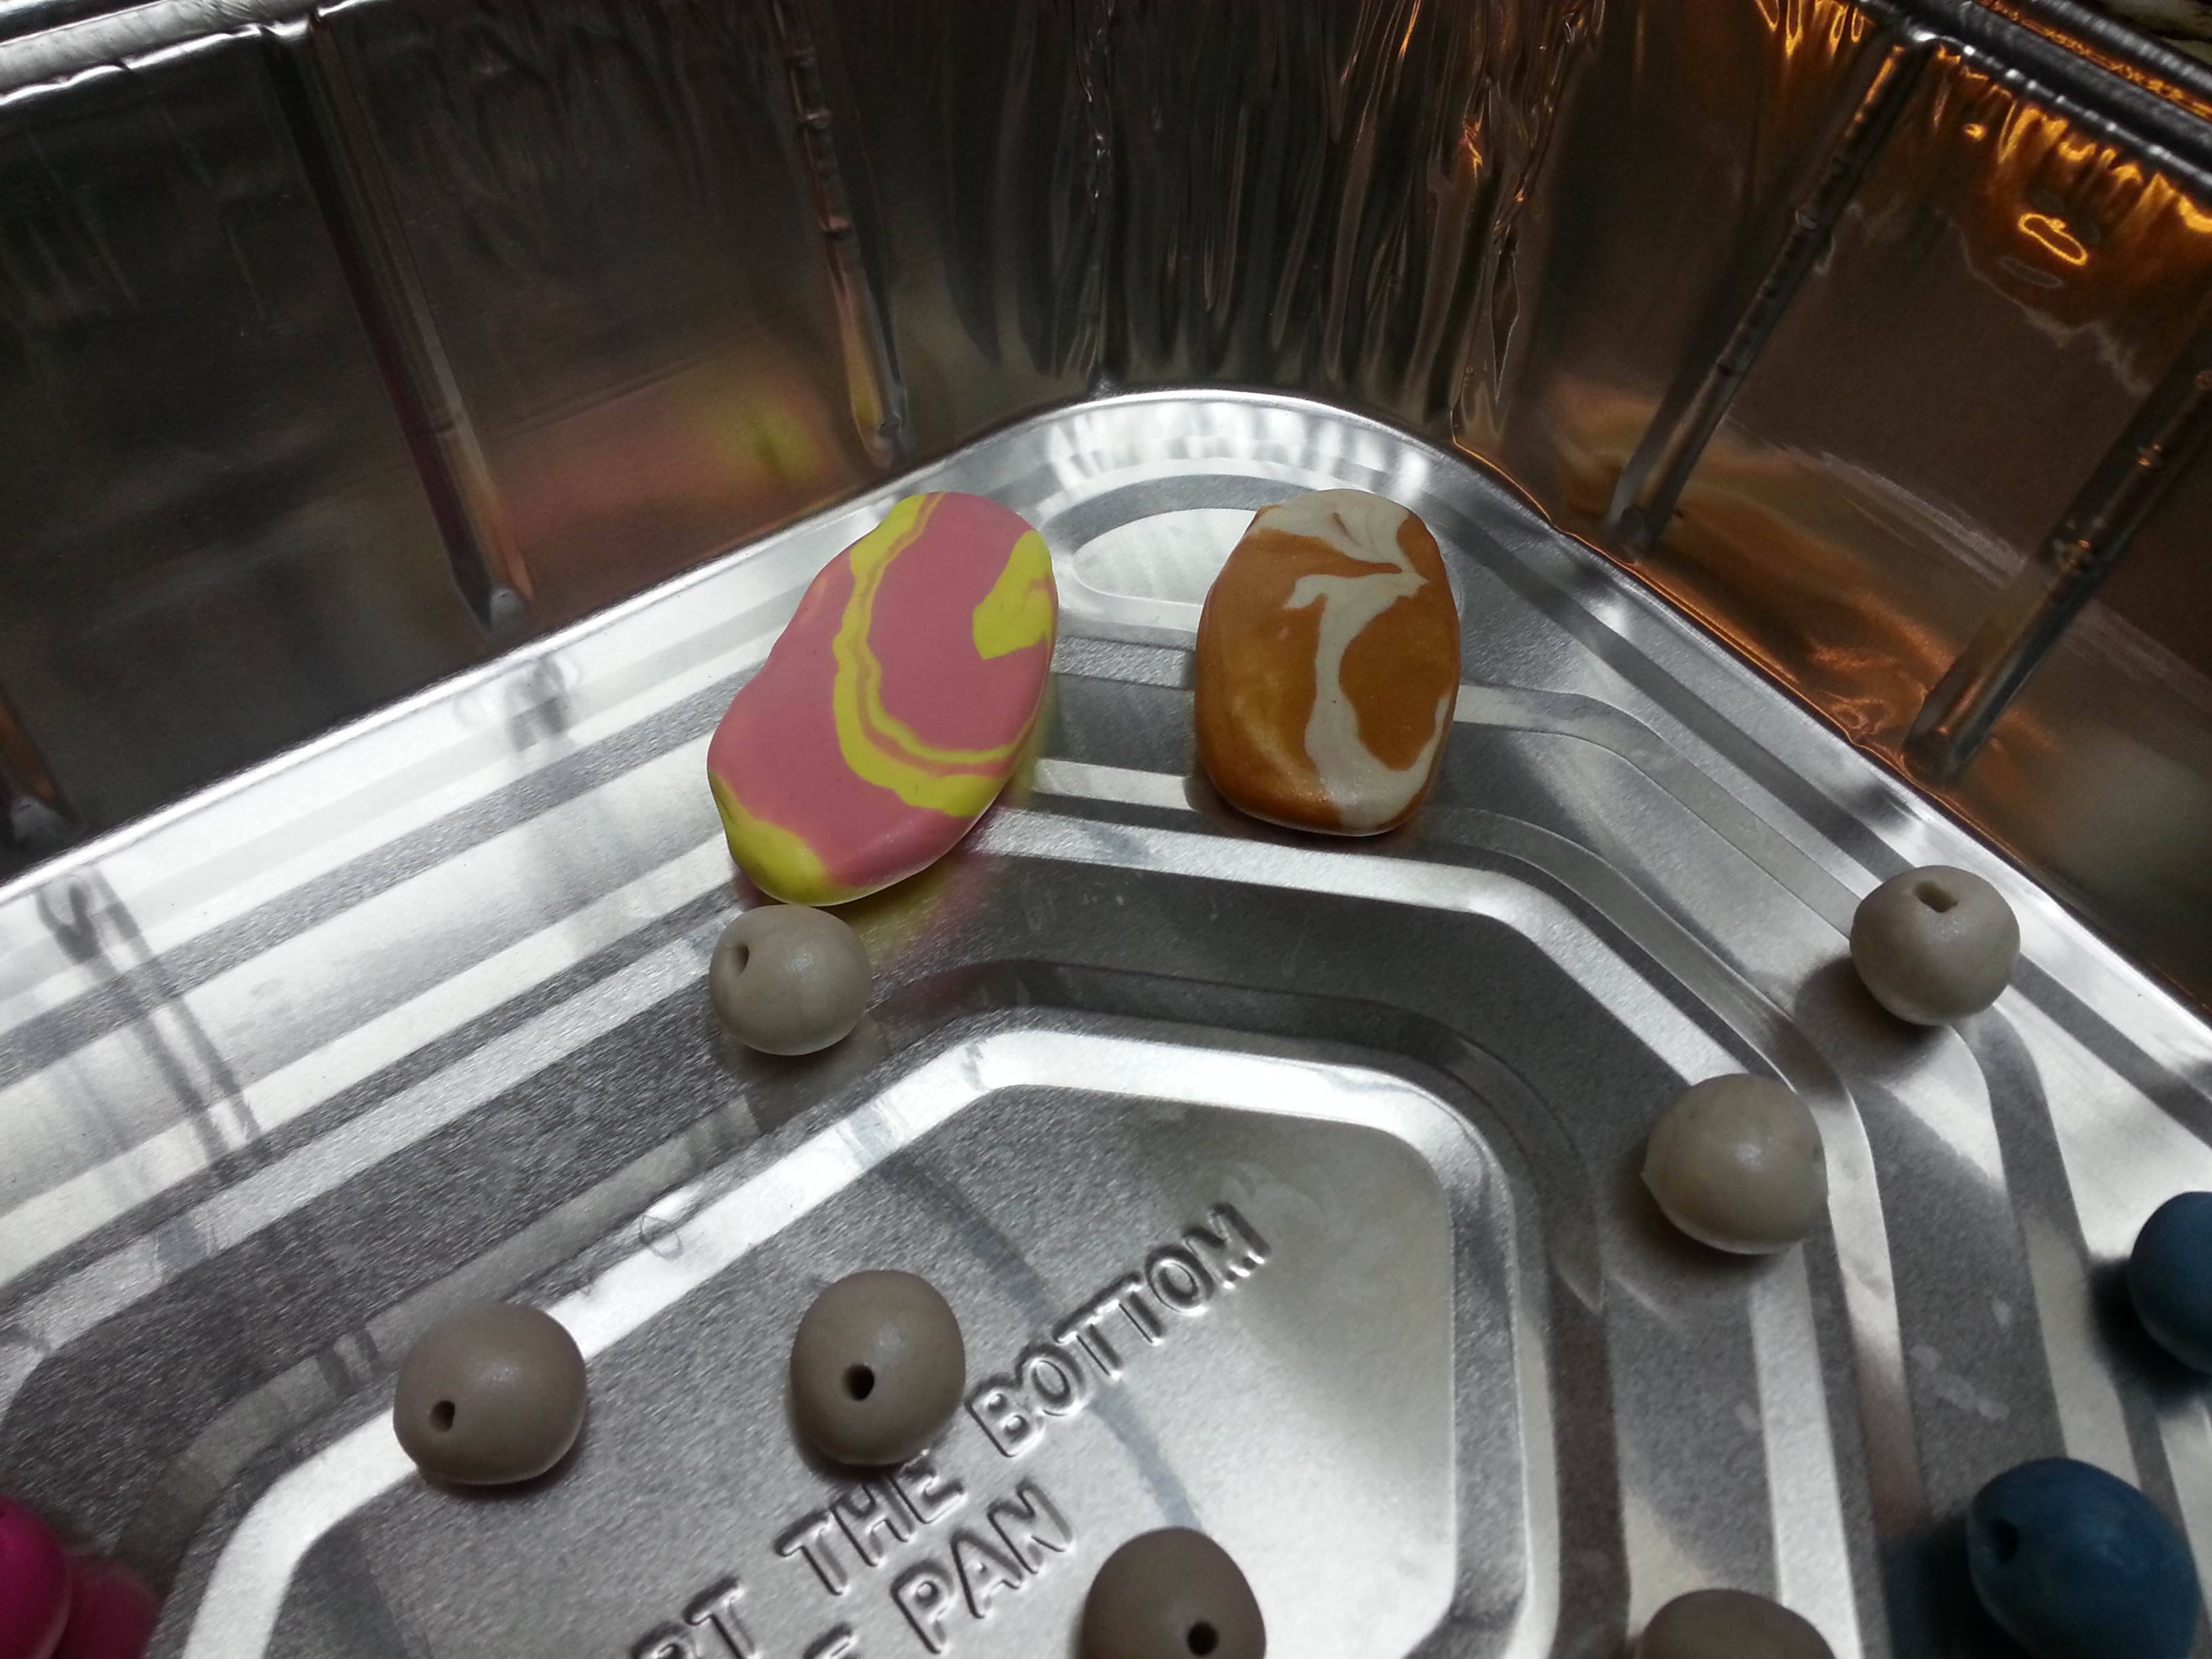
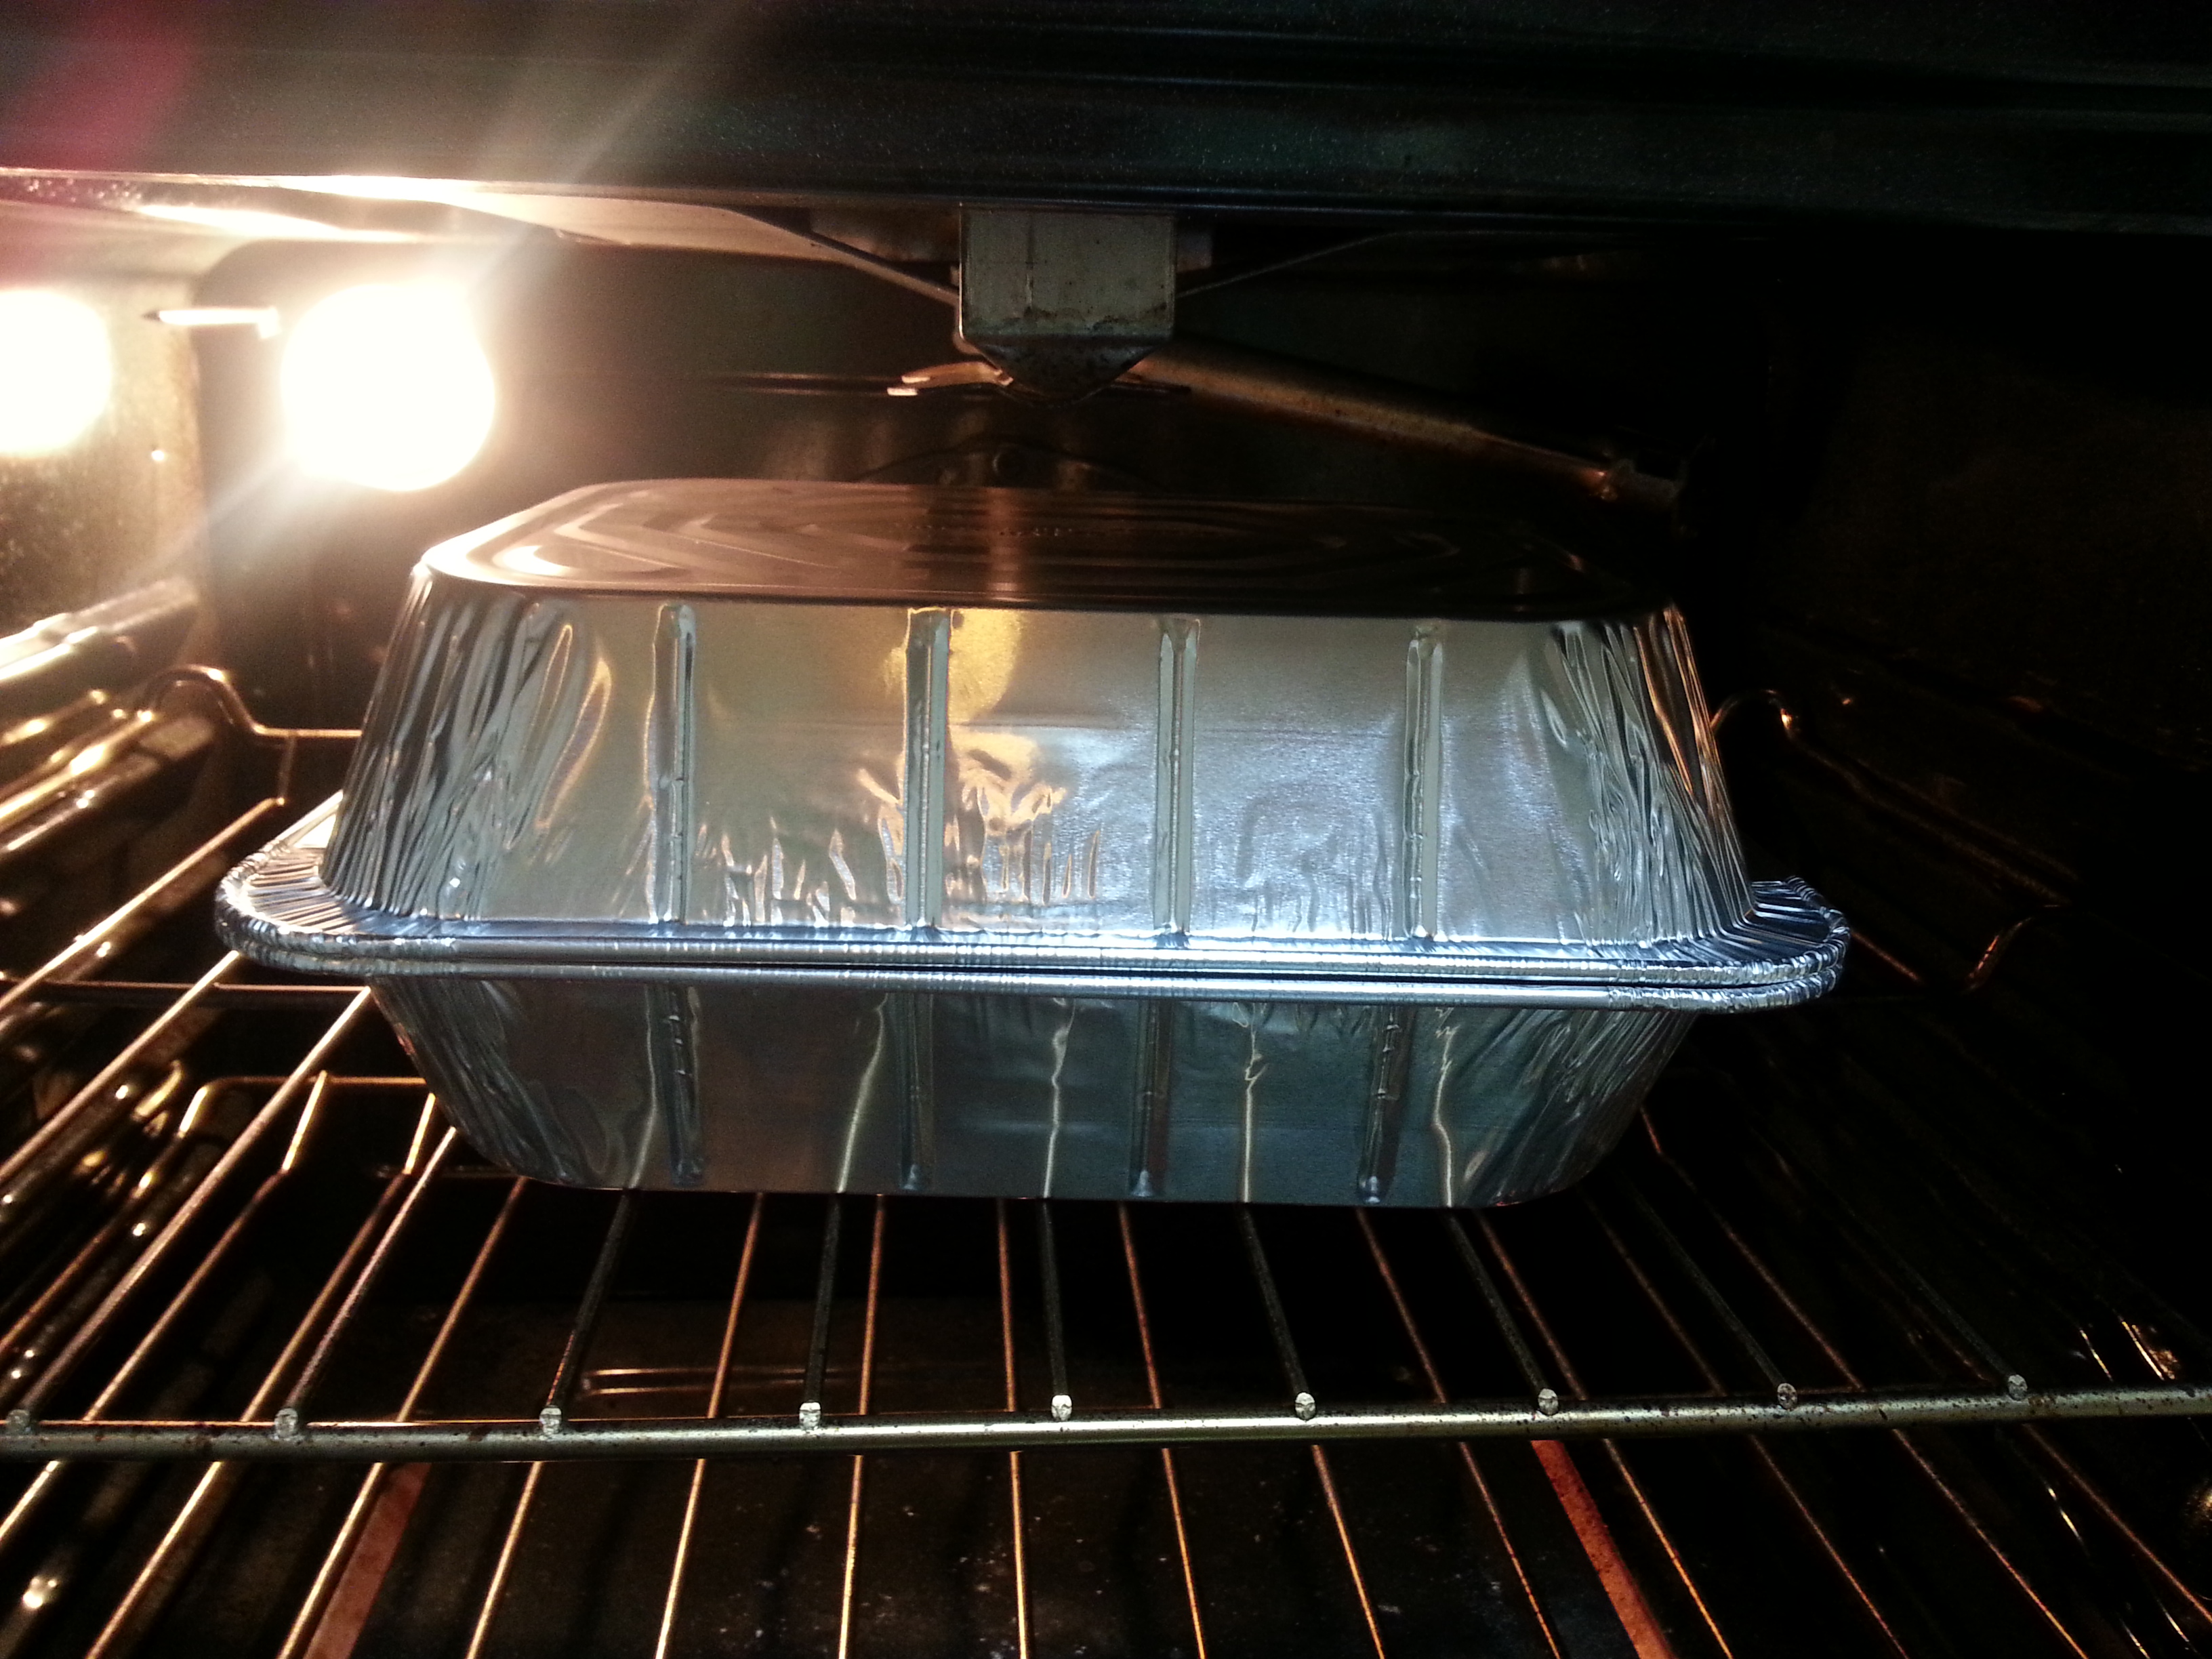
  8. Place on a baking sheet (I use a disposable lasagna pan) in a 325 degree oven for 20 minutes. (I used another sheet on top to cover it).
  9. Remove from oven and let cool for about 15-20 minutes.
  10. Measure out your cord and put the pendant on it. Tie cord into a knot if doing a long necklace, or attach a necklace clasp to each end if doing a shorter necklace.

necklace 11necklace 10necklace 9necklace 7necklace 6necklace 5necklace 4necklace 3necklace 8My oldest daughter and I did this together because she wanted a pendant necklace as well. She also was making birthday presents for some friends and made them some really pretty necklaces which they loved.

This stuff is really easy to work with and pretty inexpensive. I bought the cheapest clay at the store and am really happy with it. So even if aren’t the “craftiest” (like me!) this is still a fun activity to do alone, or with your kids.

Advertisement

DIY Christmas Decor

As far as Christmas decorating goes, that pretty much falls on the man of the house. At least, the outside of the house. He’s very into the lights being just so and all that. Tight and straight, no sagging lights. For a couple years, he even decorated the street light in front of our house. The whole entire thing! Yes, the enormous concrete pole. It took a huge ladder propped against the pole and laying halfway into the street, with our neighbor watching and making sure a car wouldn’t run right into it. Last year I insisted he NOT do that again, since I’m pretty sure I lost a few years of my life watching him do that.

This year, I decided to change things up a little bit from the standard indoor decorations we usually have. But decorations are expensive (unless you get them AFTER Christmas) so I went the semi-homemade route. And I’m very simple about holiday decorating. Kudos to you people out there that switch out everything! The bathroom, the kitchen, EVERY ENTIRE THING IN YOUR HOUSE! I’m not up for that kind of work, nor do I have room to store everything. So simple it is! Here’s some mason jars that I filled with sand (from my very own backyard) and holly that I got on sale at Michaels. The ribbon was leftover from Christmas last year.

decor 3I also saw this Christmas card holder on a boutique website that they were originally selling for $12.99 but was marked down to $5.99, not including shipping. And all you got was twine and clothespins. Well, that stuff was sitting in my garage for $0.00, so it got strung up across the mantle. Now I need some more Christmas cards to hang up there!

decorI got these pinecones at the park on my street a few years ago. I brought them home and Adam spray painted them for me.

decor 2So there you go! Simple, rustic, inexpensive Christmas décor made mostly out of things laying around my house. And I love it all!! But if you don’t happen to have this type of stuff laying around, any kind of dollar store will most likely have some things to get you started. P.S. Dollar Tree is my favorite!

And this Christmas tree is planted in my front yard. We bought it three years ago because we wanted a live, uncut tree that we could plant and watch grow over the years. When we got it, it was only about a foot and a half tall. Now, it stands about 7 feet tall!!! If I had a bigger yard, I’d buy a live tree and plant it every year.

tree

Refried Beans

refried beansSomething that used to intimidate me? Dried beans. Yes, dried beans. As silly as it sounds! I’ve always been a canned bean kind of girl and it wasn’t until a couple of years ago that I decided to give dried beans a go.

I knew they were time consuming (soaking them and cook time). But what I didn’t was that they are actually incredibly easy to make. And so much better tasting than their canned counterparts. And even though you’re supposed to soak them, it’s not a requirement.

Truth be told, I’ve had quite the trials with my refried beans. There have been many a time where I’ve added way too much salt and they were basically inedible. Or I didn’t let them cook long enough, and they really weren’t as tender as they needed to be. But lo and behold, here’s a recipe that works.

These “refried” beans taste pretty authentic. I use quotes because they are not traditional (no lard involved) however, if you can get that authentic taste at home, I consider it a win. I’ll say it before and I’ll say it again, getting authentic international flavor at home is hard to accomplish. I think that’s why so many people go out to eat, because you can’t get that same flavor at home. But here you go. Make this and you’ll feel like you’re at a Mexican restaurant. That’s in your very own kitchen.

Refried Beans

  • 2-2 1/2 cups dried pinto beans
  • 1 smoked ham hock
  • 1/2 white or yellow onion, chopped
  • 3 garlic cloves, minced
  • 1 tsp. salt
  • 1 tsp. ground cumin
  • 1/4 tsp. ground pepper
  • 1 tomato, chopped
  • 1 tbsp. bacon grease

Rinse the beans. Add to a large pot (I use my Dutch oven) and fill with water to just about 1″ above the beans. Let soak. If you don’t have the time or you just simply don’t remember this, that’s okay. I think the longest I’ve ever let my beans soak is about 4 hours.

Add the ham hock to the pot. Heat the pot on high until it comes to a boil. Cover with a lid, and reduce to a simmer for 3 hours if beans were soaked, about 4 hours if beans were not soaked. Make sure to check on these a couple times throughout the cooking time to make sure the water hasn’t evaporated. If you feel the water level is too low, you can add a little more water to the pot.

Remove lid and stir in the rest of the ingredients, except the bacon grease. Cover with a lid and let simmer for an additional hour.

After the hour is up, mash lightly (I use a potato masher) until your desired consistency and stir in the bacon grease until it melts. You can leave the ham hock in and mash around it or remove and discard. My dad loves them so when he’s over, the ham hock is his. But I just use it to flavor the beans. Also, if you feel the beans are too runny, you can let them simmer a little bit longer with the lid off until they thicken further.

This recipe makes a large amount. Enough so that I can usually freeze the other half which in my opinion, is so worth it so we can have beans at the ready for the next time we want Mexican. refried beans 6refried beans 5refried beans 4refried beans 3refried beans 2

Creamy Cajun Pasta with Andouille Sausage

cajun pastaA pasta dinner is such a nice comfort meal. And I’m all about comfort food!! Especially when I can do a double carb overload. I love eating pasta with bread. Don’t judge. It’s like a must for me.

But it’s nice to change things up a bit so this pasta recipe doesn’t have a red sauce. Instead, it’s creamy and got a little kick to it! So watch out for the little people in your house in case they can’t handle spicy. I got my Andouille at the butcher counter and it was fresh made so it was actually pretty mild but it’s typically packing some serious heat.

This recipe also makes for a really quick weeknight meal because it comes together so fast. And it’s pretty inexpensive. So if you’re tight on time and money, try this one out!

Creamy Cajun Pasta with Andouille Sausage (serves 6)

  • 1 tbsp. olive oil
  • 3/4- 1 lb. Andouille sausage
  • 1/2 onion, thinly sliced
  • 1 green bell pepper, thinly sliced
  • 1/2 lb. crimini (aka baby bellas) mushrooms, thinly sliced
  • 2 garlic cloves
  • 1 lb. rigatoni pasta
  • 1/2 c. white wine
  • 1 c. half & half
  • 1/2 tsp. dried oregano
  • 1/4 tsp. onion powder
  • 1 1/2 tsp. creole seasoning
  • 1/2 tsp. chili pepper flakes (optional)
  • 1/4 c. grated parmesan cheese

Fill a large pot of water and bring to a boil. Add pasta and cook according to package directions. Drain and set aside.

In a large sauté pan, add the olive oil and heat on medium. Add the Andouille sausage. I removed mine from the casing. But other types are fine to slice into coins. Brown up the sausage and break it up. Add in the onions, bell pepper and mushrooms. Continue cooking and stirring for several minutes or until sausage is cooked through. Add the garlic and cook for about 30 seconds more. Then add the wine to deglaze the pan. Make sure to stir and remove any bits from the bottom. Let cook until the wine has almost completely reduced. Add in the half and half, as well as all of the spices and cheese. Cook for a few minutes or until the sauce has thickened slightly.  Add in the pasta and stir to combine and coat the pasta. Serve immediately.

cajun pasta 6cajun pasta 5cajun pasta 4cajun pasta 3cajun pasta 2

Spice Rubbed Roasted Chicken Legs

spice rubbedSo here’s a new recipe I tried out on my guinea pigs family the other day. I had picked up some chicken quarters at the grocery store for $.99 a pound. What a steal! When I saw that price, I knew I couldn’t pass it up. I mean, that is really freakin cheap inexpensive. And considering that my oldest daughter now eats like a full grown woman, a big chicken leg sounded like a good plan.

In case you’re not familiar with chicken quarters (also known as a whole chicken leg) it’s the thigh and the leg/drumstick together, bone in, still attached, connected, as one….You get it. And it’s dark meat. In case you’re a white meat, chicken breast lover, please don’t automatically dismiss this recipe. The thigh meat (in my opinion) is the best meat on the chicken. Tender, juicy and full of flavor. Also, with this recipe, we’re leaving the skin on. And that skin is going to be crispy! Let the drool commence NOW!

FYI, since the skin does get seared, be prepared for a smoky house. My husband walked in and wanted to know what the hell was going on. But luckily, I didn’t set off any smoke alarms.

Spice Rubbed Roasted Chicken Legs (makes 4-6 servings)

  • 4-6 chicken quarters (also known as whole chicken legs)
  • 4-6 tbsp. butter
  • 1 tsp. each cumin and chili powder
  • 1/2 tsp. each of paprika, onion powder & garlic powder
  • 1/4 tsp. each of salt and pepper
  • 2-3 tbsp. olive oil

Mix together all of the dried spices in a small bowl. Place 1 tbsp. of butter underneath the skin of each chicken leg (on top of the thigh). Drizzle a little bit of olive oil over the top of the chicken. Then sprinkle the spice rub all over the skin as well as lifting the skin on the thigh up and rubbing the spice mix under the skin too. Place in an airtight container in the fridge for 6 hours (or more).

Take chicken out of the fridge and let come to room temperature, approximately 20 minutes. Preheat oven to 425 degrees. Then heat a cast iron skillet over high heat. When nice and hot, add in 1-2 tbsp. olive oil and place chicken skin side down in the skillet. Do not move it, and let it sear for 3-4 minutes. This is when it’s going to get all smoky! With the butter melting under the skin and the hot oil, it’s going to get hot up in your house. So make sure to turn that fan on! Turn over, and let sear for about 2 minutes on the other side. Then place on a foil lined tray (or a dish big enough to hold all these legs). I was able to do 2 chicken legs at a time. So you most likely will have to work in batches too. You don’t want to overcrowd the pan as you want the skin to sear and crisp up, not steam and get rubbery.

When all chicken legs have been seared, place in the oven and cook for 45 minutes. When the legs are all done, let rest about 10 minutes and then drizzle with your favorite barbeque sauce.

spice rubbed 7spice rubbed 6spice rubbed 5spice rubbed 4spice rubbed 3spice rubbed 2So I did 6 chicken legs for my family and we had leftovers. And since I’m all about leftovers and re-purposing, I suggest removing the skin and pulling that chicken off to make some chicken salad. Might I suggest my recipe for Almond Chicken Salad? 🙂